How to Import EMLX to Thunderbird – Solved


It is not easy to access EMLX files on Windows platform, as it is typically formed by Apple Mail (the default email client of Mac OS). In order to import EMLX to Thunderbird without changing its properties, it is important to use a dedicated tool.
By adding them to Thunderbird, you can work with these files (view, send, and process) without any problems from within the Thunderbird application. Here, we will provide you with the best solution to add EMLX files into Thunderbird easily.
Best Method to Import EMLX Files to Thunderbird in Bulk
Thunderbird Import Wizard is the best solution to easily add EMLX files to Thunderbird. It provides the option to directly add the EMLX files into Local Folders or a POP account without failure. The tool is tested to run on Windows 11(64-bit) and Windows 10/8.1/8/7 (32-bit & 64-bit) with ease.
Download for Windows Download for Mac Purchase Now
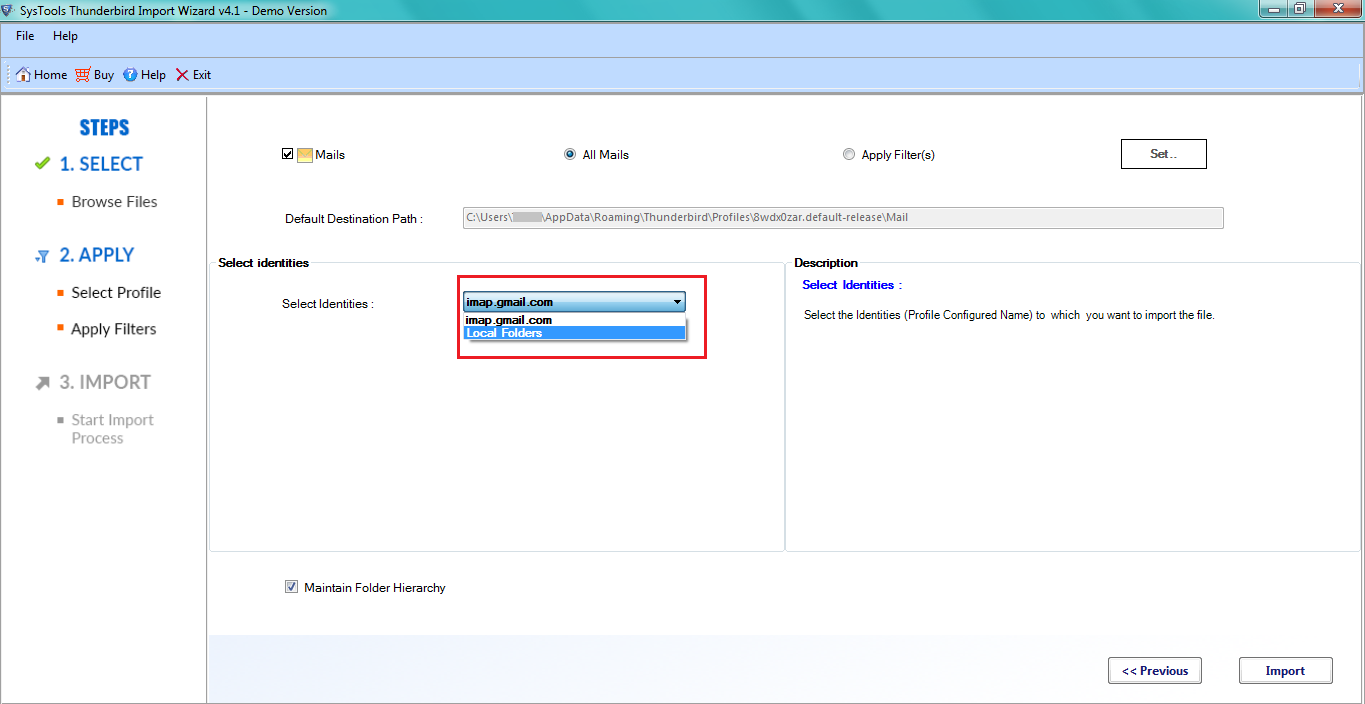
Keep in mind that it is technically not possible to directly add a file to an IMAP account. However, you can simply import the files into the Local Folders section and then copy/move the emails from there to the IMAP account mailbox.
Steps to Add EMLX to Thunderbird
1. Launch the software on the machine. Do note that the free demo version only imports 25 EMLX files into the Thunderbird application. For unlimited import, get the full licensed product.

2. Click on the Add Folder button and select the folder that contains all the EMLX files you want to import into Thunderbird. Then, click on the OK button.
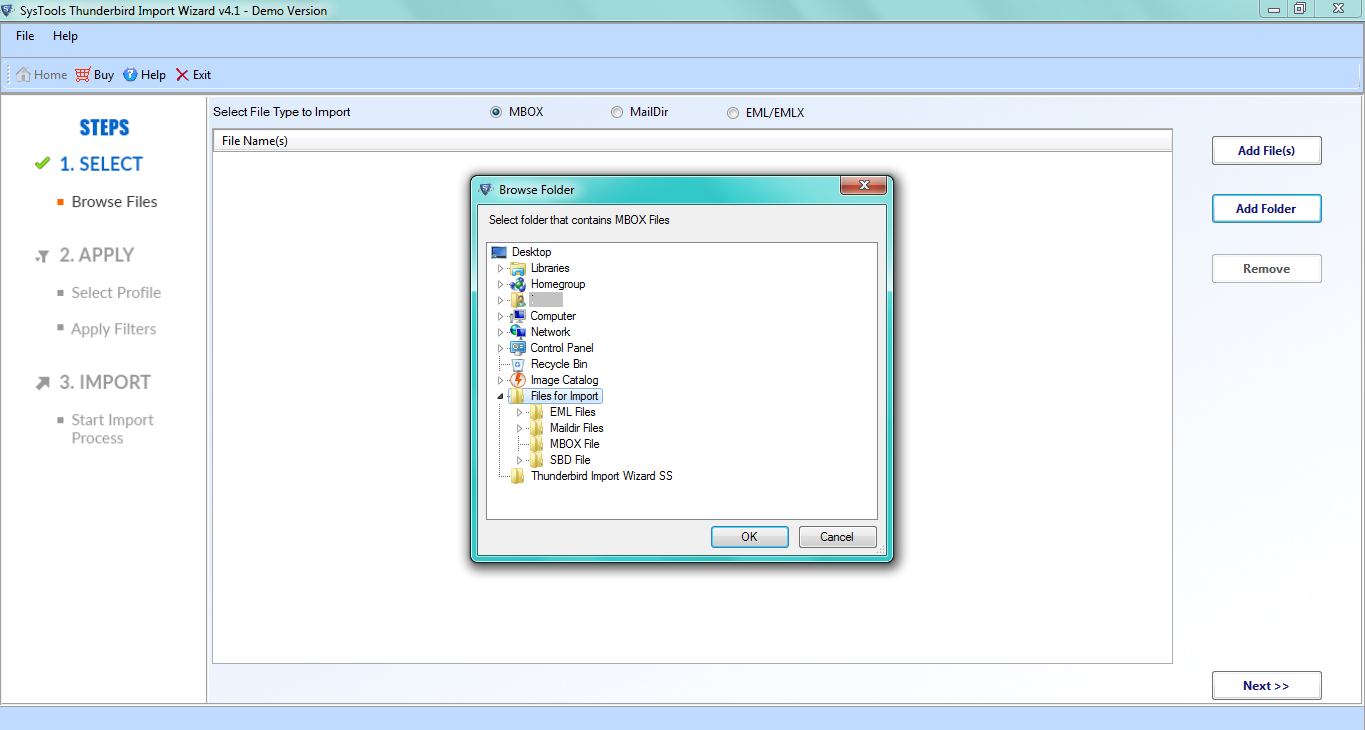
3. It will add all the EMLX files to the software. Click on the Next button to continue the process.

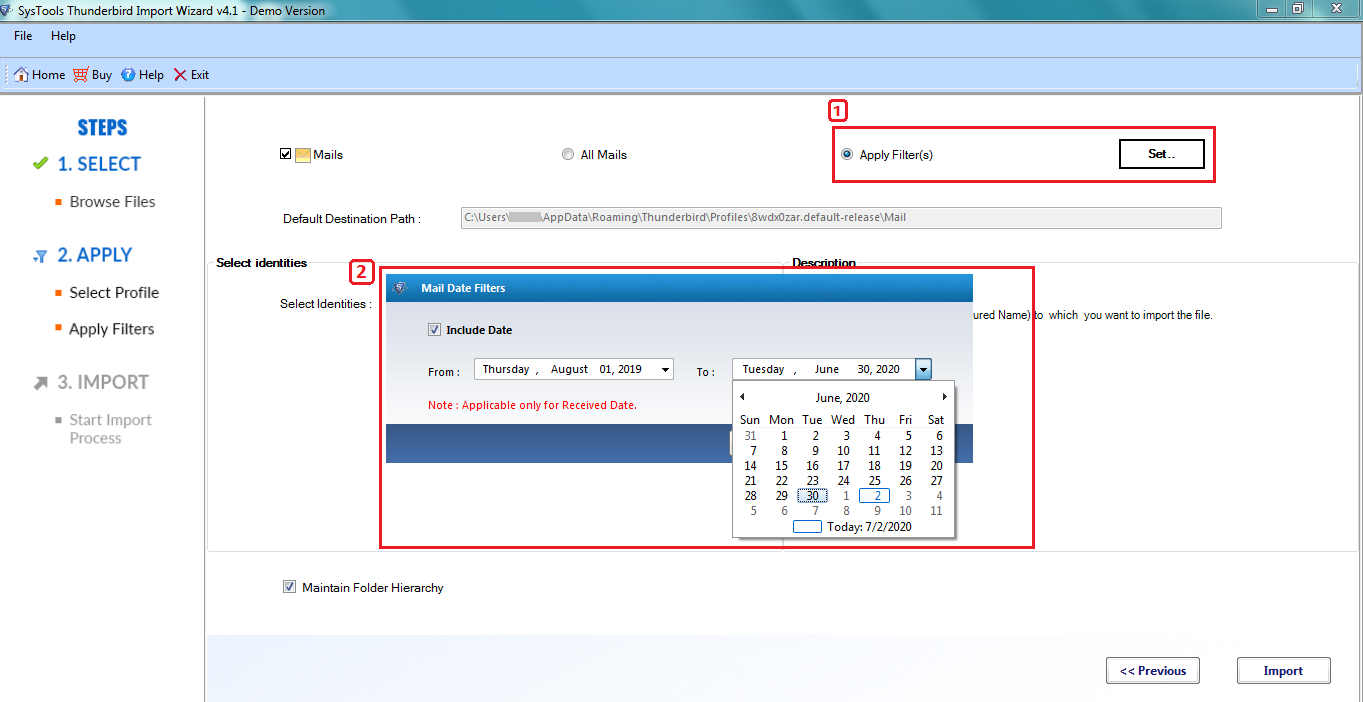
4. In the window that appears, you can set date-range filters that will filter and import only those EMLX files that contain email messages of the set range of date.
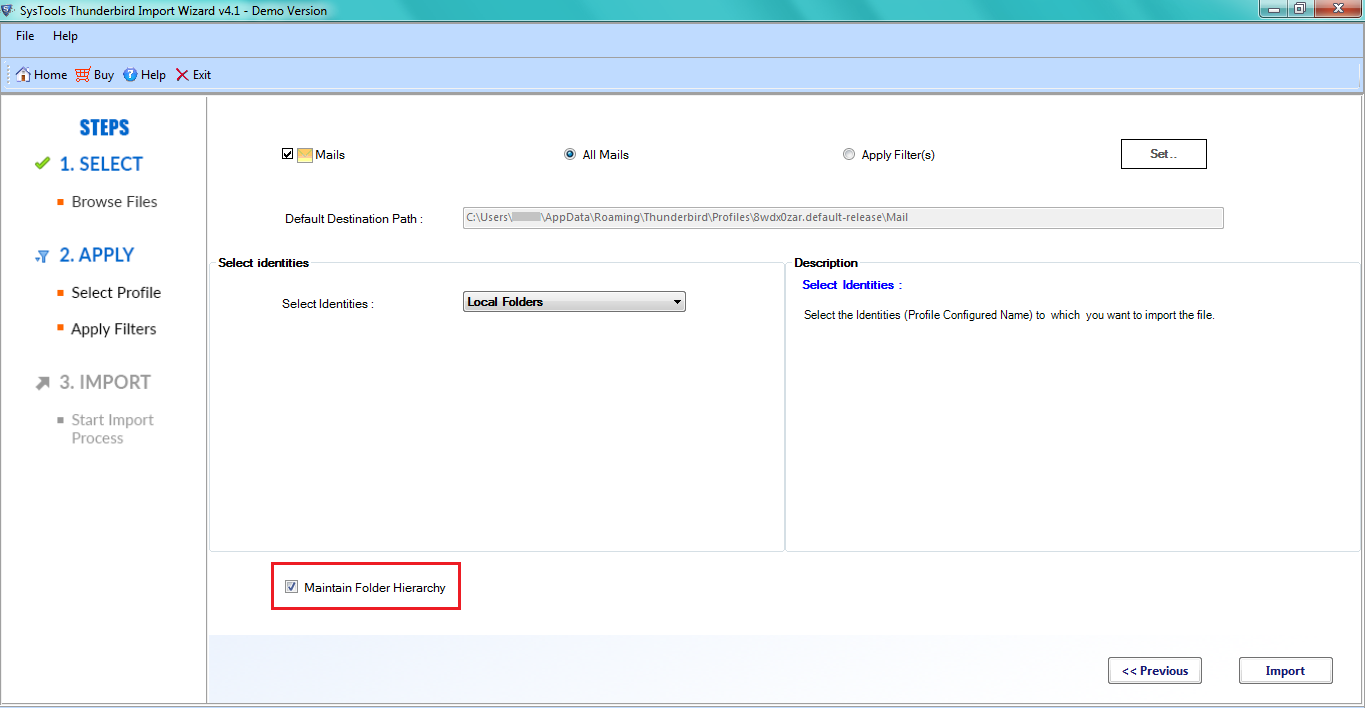
5. For uploading all EMLX files, simply select the All Mails radio button.
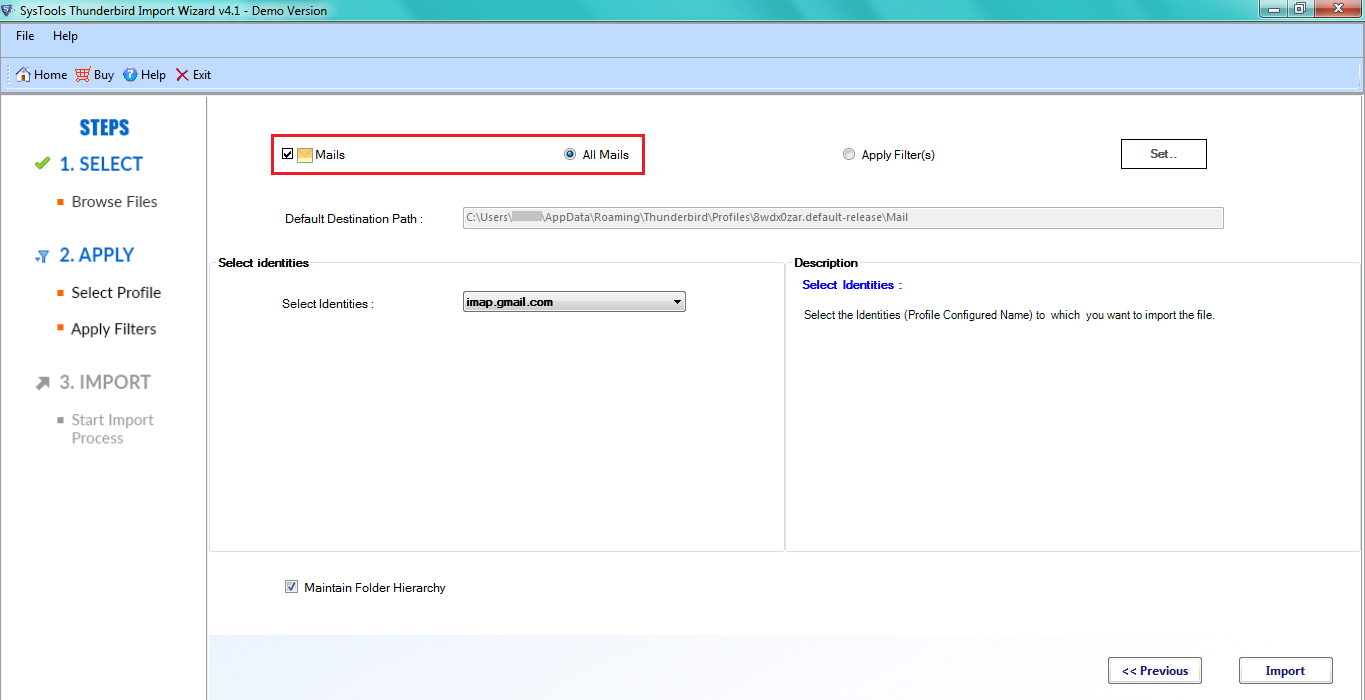
6. After that select the Local Folders option in the Select Identities section.
7. Also, you can select the Maintain folder hierarchy option that ensures maintaining the on-disk folder hierarchy of the added EMLX files.
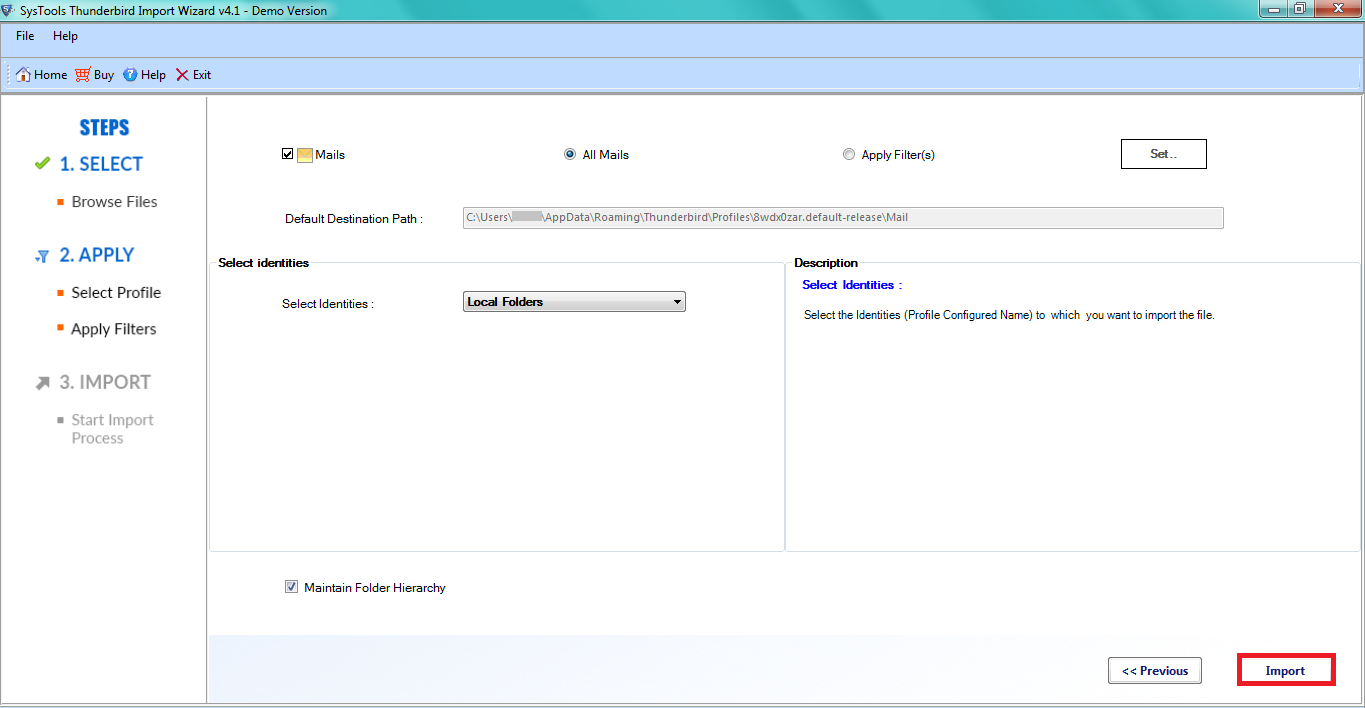
8. Finally, click on the Import button to start adding EMLX files into Thunderbird application present on your system.
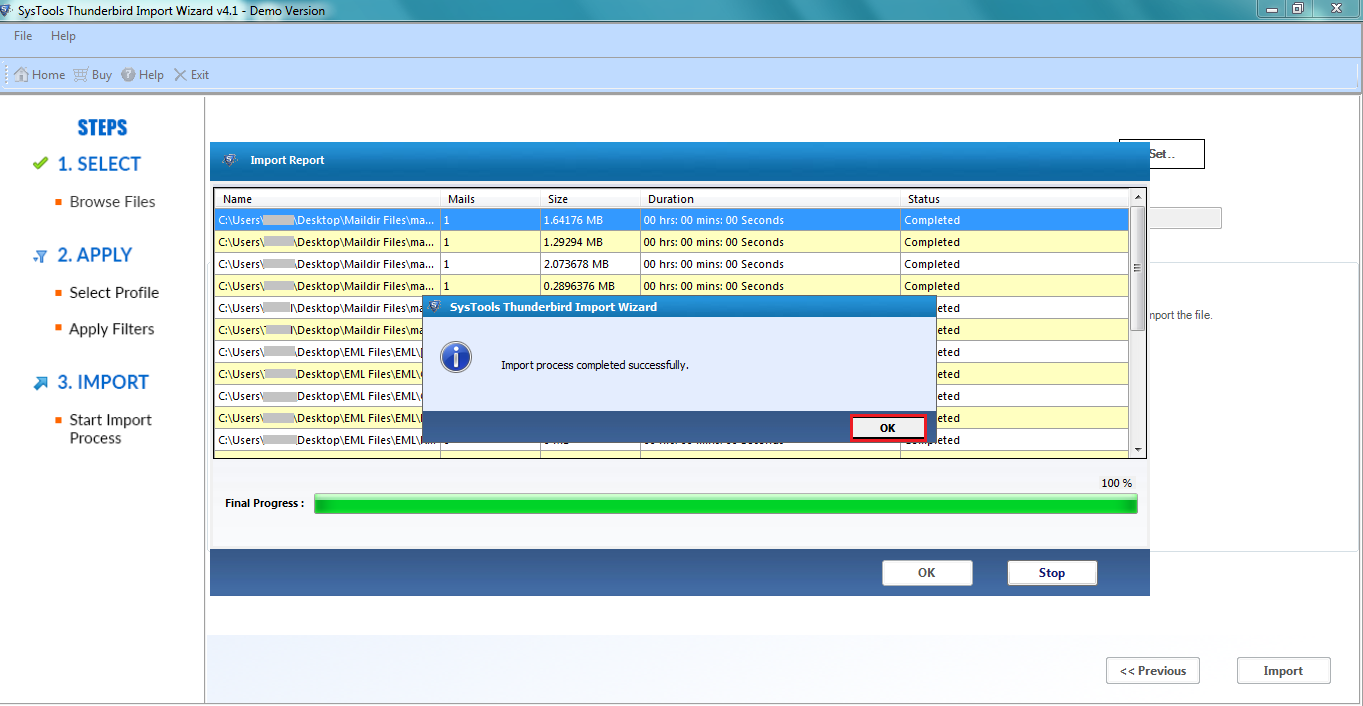
9. After the successful import, click on the OK button.
10. Now, open your Thunderbird account and find all the imported EMLX files under Local Folders. If you want to store these email messages in a configured account, you can select them, right-click >> Move to and choose the email account to move the emails to the preferred mailbox account.
Benefits of Using This Software
Direct Import to Thunderbird: This solution will directly add the files to the Thunderbird account. It won’t waste time by converting the files into no-extension MBOX files of Thunderbird and letting you import them manually.
Date-Range Filters: You can easily add only specific emails that fall under a certain date range. For this, make use of the Date Filters which provides you with the “From” and “To” options. It will import the EMLX files that carry messages falling in between the provided From and To dates.
Maintain Folder Hierarchy: Many users want to keep the on-disk folder hierarchy of the files in Thunderbird after importing them. Keeping that in mind, the given solution provides the option to enable or disable the folder hierarchy option for user convenience.
Works with Multiple Formats: This software imports files of several kinds into the Thunderbird email account. This involves:
- MBOX – It supports MBOX and similar files like MBOX without extension, .mbox, .mbs, and .mbx files.
- Maildir – You can also import Maildir files into Thunderbird account.
- EML – The tool also supports importing EML files to Thunderbird of all origins.
- EMLX – And of course, it easily imports multiple EMLX files into Thunderbird.
Final Thoughts
It is evident that importing EMLX to Thunderbird is a very simple task when using the given solution. After all, it is easy to use, provides lightning-fast transfer, and provides advanced options when adding files. In fact, there is a demo version available to test the tool for free before making the purchase. So, give it a try and see how easy it makes the entire transfer process.
