How to Convert Mac Outlook OLM to PST File Format? – Verified Ways


Are you trying to convert OLM to PST format? Don’t worry, we have a free method to convert OLM files to PST manually, step by step.
Microsoft Outlook is among the most popular email applications for managing multiple webmail accounts in a centralized manner. It is part of the widely used Office 365 suite. Hence, many organizations adopt Outlook as the default email client due to its familiarity and ease of use.
However, Outlook itself comes for both Mac & Windows. So, when an organization or individual switches from Mac to Windows, the application also switches from Outlook for Mac to Outlook for Windows. Therefore, it becomes necessary to convert OLM to PST file format to access the Outlook for Mac email application on its Windows side.
Let’s move ahead and understand why it is necessary to do so.
All About OLM & PST File Format
Before we learn to convert OLM to PST, it’s important to know about these file formats. Microsoft Outlook is available for Windows and Mac Operating systems. While Outlook for Mac works with OLM format, the Outlook for Windows email client deals with OST & PST format.
OLM files store emails, contacts, calendars, tasks, notes, and journals in Outlook for Mac email clients. It is only used by Mac Outlook and cannot be opened with the Windows version. It was introduced with Microsoft Outlook 2011 for Mac.
On the other hand, PST (Personal Storage Table) also contains email messages and other mailbox items and is saved on the computer. POP accounts download the mailboxes from the mail server and store them on the computer in .pst file format.
Table Comparison – OLM vs PST
| Comparison Parameters | OLM | PST |
| Abbreviation | Outlook for Mac data file | Personal Storage Table |
| Creation | It is created manually by users to store Outlook for Mac data. | It is created automatically when using the POP protocol as well as manually with the Import/Export option. |
| Supported OS | macOS |
Windows and macOS
|
| Data Synchronization | No synchronization with the server |
Data synchronized with the server
|
| Exporting Options | Exports entire mailbox data |
Selective export available
|
Do you know: OLM files don’t work on Windows, and PST files need third-party tools for macOS. This affects the 15% of users switching operating systems annually, highlighting the need for efficient file conversion.
A corporate PST file can shoot up to over 50 GB since there is heavy email traffic with an average of 121 emails each day. This will support the storage of gigantic data, but at the same time, it brings the risk of corruption beyond size limits, along with performance degradation. OLM files, too, are smaller but fall under the same problems with portability and crashes. 71 percent of businesses that use Outlook face such issues when it comes to file format limits during migrations or cross-platform access.
Why Users Need to Convert OLM to PST File Format?
The following are some reasons which are going to describe the reasons behind converting OLM files into PST format:
- When a user switches from Mac to Windows but wants to keep using the Microsoft Outlook application, he/she need to import the OLM file to Windows Outlook. To do that, one must imply this conversion of the OLM files to PST format first.
- If the user wants to access the data of an orphan file, i.e., an OLM file that is not connected with the Outlook application anymore, in the Windows operating system.
- Sometimes, an Outlook user receives OLM files from others and needs to open OLM file on their Windows system. Also, there are situations where the user needs to provide other people with PST files, but he himself has OLM files.
Convert OLM to PST File Format Quickly
Both OLM and PST are created on different platforms and are not correlated. So, it is not possible to change or mix theore data directly and create a single file. But using the OLM to PST converter software explained below can easily export complete data. Follow the steps:
- Download OLM to PST Converter and install it on your system. After this, add the OLM file to the software using the Add File or Add Folder button.
- Now the software will load the entire data of the browsed OLM file into the software panel.
- Hit the Export button and select the PST radio button from the list, and apply advanced settings.
- Browse the path to save the exported file after completing the OLM to PST conversion process.
All set, your job done. The above 4 steps are enough to convert OLM to PST file format. It is quite simple, but it is not free. If you want to try free ways, then read the section below.
How to Convert OLM to PST For Free Using IMAP?
- Open Microsoft Outlook on your system.
- Set up a ‘new email account‘ in Outlook for Mac.
- Import the OLM file and transfer its emails to the new account.
- Set up the ‘same email account‘ in Windows Outlook.
- Convert the OLM file to PST format from Outlook.
If the steps are unclear to you, follow the guide below to get a detailed explanation. There are several methods to convert OLM files into PST format manually. However, all of them work on the same framework, i.e., email account configuration to move the mailbox data. Let’s take a look at the process (Each step has sub-steps) to convert OLM emails into PST file format one by one:
Step 1: Set up a New Email Account in Outlook for Mac
- Create a new Gmail account and open it on your web browser to convert OLM to PST format.
- Go to its Settings and enable the IMAP option in the Forwarding & POP/IMAP tab. Then, save the changes.
- Open Outlook for Mac, then go to Preferences and select Accounts.
- Click on the plus (+) sign, select New Account, and enter your Gmail email address here.
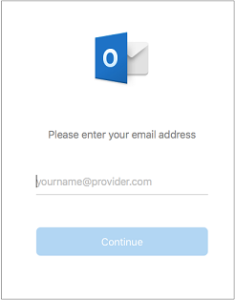
- After that, enter the password and hit the Add Account button.
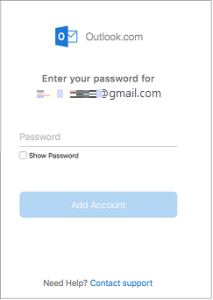
- In the Set up your Email window that appears, click on Continue.

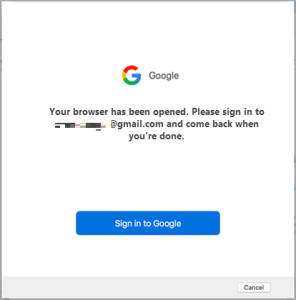
- Then, a message will appear: ‘Your browser has been opened. Please sign in and come back when you’re done. Here, click on the Sign in to Google button.
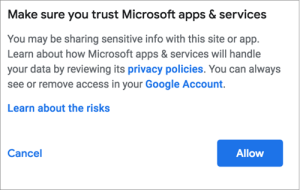
- After re-entering the credentials and verifying the details, click on the Allow button to confirm the configuration process.
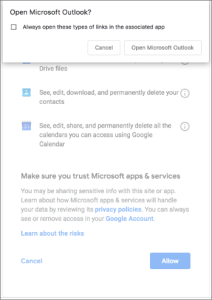
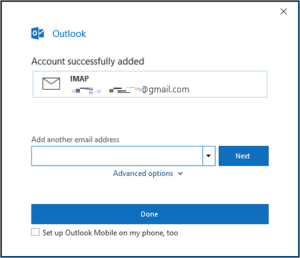
- A confirmation box will appear. Here, click on the Open Microsoft Outlook button to proceed.
- At last, hit the Done button, and the email account is successfully configured.

Step 2: Import the OLM file & Move Its Emails to the New Account
The second step to convert OLM to PST requires you to import the OLM file into the application that contains the newly configured account. Then, move the data from the OLM file into this configured account mailbox. After that, let the data synchronize with the mail server.
Step 3: Set up the Same Email Account in Windows Outlook
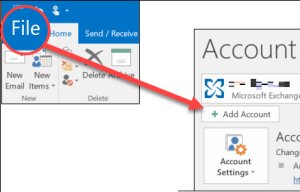
- Now, launch Windows Outlook and go to File, then Add Account.
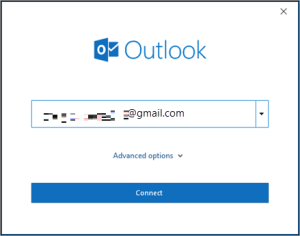
- After that, enter your Gmail email address and click the Connect button to proceed.
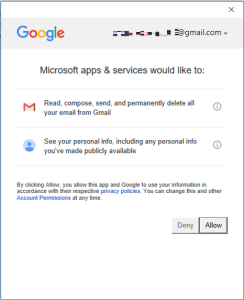
- The application will open the browser to sign in to the Google account and confirm the credentials. Re-enter the account details here and click the Sign in button.

- Once done successfully, click the Allow button to close the browser and go back to the Outlook application.
- At last, click the Done button once the account is added successfully.
Step 4: Export OLM File to PST Format
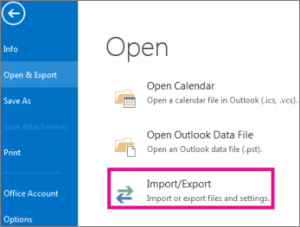
- Open the File menu, then select Open & Export, then click on Import/Export to export emails to PST.
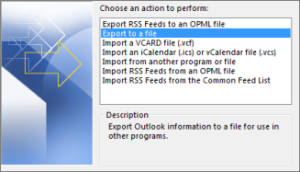
- Select Export to a file in the Import & Export Wizard window and then click on the Next button.
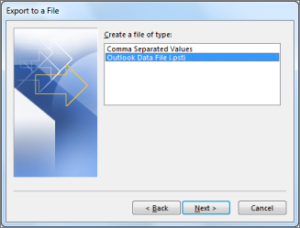
- Select the Outlook Data File (.pst) in the Export to a file window, then click on the Next button.
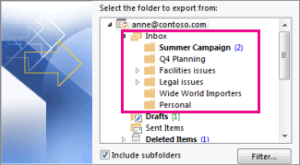
- Now, make sure to select the mailbox of the newly configured account that contains the OLM emails, then click on the Next button.
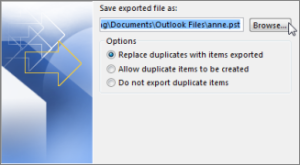
- At last, browse the location to save the PST file and click on the Finish button.
With this, you have successfully converted OLM to PST format using the above steps.
Convert OLM to PST File Format Using POP
This method involves using a POP email account to transfer your Outlook for Mac data to a Windows system, where you can then export it to a PST file, which is compatible with MS Outlook on Windows. Below are the steps to convert OLM files to PST format using the POP method.
Step 1. Setting up a POP email account on your Mac system
- Open Outlook for Mac and go to Outlook > Preferences > Accounts.
- Click the “+” button to add a new email account.
- Select the “POP” option and enter the details of your email account.
- Complete the account setup process.
Step 2. Sync OLM data with a POP account on your Mac system
- In Outlook for Mac, go to the “Mail” section and check whether your POP account is selected or not.
- Check all your emails, contacts, calendars, or any other data related to your OLM file should syncs with your POP account.
Step 3. Setting up the same POP account on your Windows system
- Open MS Outlook on your Windows system.
- Go to File → Account Settings →Account Settings.
- Click “New” and select the option to create a new POP account.
- Enter the same email account details that you used for your Mac account.
Step 4. Sync the POP Data to Your Windows System
- After setting up the POP account, MS Outlook will start syncing your data from the POP server.
- Wait for the process of data synchronization to complete.
Step 5. Export Your Data from Outlook to the Windows System to PST Files
- In MS Outlook, go to File → Open & Export → Import/Export.
- Select “Export to a file” and click on “Next”.
- Choose the “Personal Folder File” option and click on “Next”.
- Select the desired folder to export and then choose your desired location to save your PST file.
- Click on the “Finish” button to begin the export process.
Note: These are the steps that may change depending on the versions of your Outlook and the email service provider which you are using. Also, the POP method performs a one-way transfer, while IMAP method allows for two-way synchronization.
Limitations When You Convert OLM to PST Manually
- This conversion requires multiple applications for its execution. Hence, it is impossible to work with this method if any of the Microsoft Outlook email clients are missing.
- When moving your emails from one account to another, there is are chance of data loss. Any kind of manual error can lead to losing your emails and other mailbox items permanently.
- The manual method to convert Mac OLM to PST is more of a tricky one, rather than an actual method. After all, it involves the use of two applications and their transfer of emails between them. Lacking any step will result in data loss.
- This free method is only applicable for moving your emails and does not take any other mailbox items like contacts, calendars, or tasks into action.
Troubleshooting Common Issues That May Arise During the Conversion
When we convert OLM to PST file, it can be a complex process, and users might face multiple problems during the conversion process. Listed below are some common problems that arise and their solutions that can help users to solve their problems while converting.
- Users may face errors while importing OLM files into Outlook for Mac. This could be due to a corrupted OLM file or a problem with your Outlook application. To fix this issue, users can try to repair the OLM file or reinstall the Outlook application.
- If you skip a step or face any technical problems, you may also experience data loss during the manual process. To avoid data loss, users need to make sure all the steps are done correctly and back up their data before starting the conversion process.
- The problem of Compatibility issues arises if your OLM file is an older version and your Outlook application is the latest version. In such cases, users can try to convert OLM files using automated tools that support all versions of OLM files.
- Having large files can slow down the conversion process. To avoid this, users can split OLM files into smaller parts.
- Incorrectly configured email accounts can cause problems during the process. Users should ensure that they have set up their email accounts correctly and entered the correct login credentials.
FAQs Related to Conversion of OLM to PST Format
Q. What is the best method to convert OLM to PST for free?
Ans. The best free method is to use a webmail account like Gmail, Yahoo Mail, etc., to facilitate synchronization between Outlook for Windows and Outlook for Mac email clients. Thereby, moving the mailbox data without touching the file format.
Q. What tools can perform such a conversion?
Ans. It depends on your requirements, really. Online tools (which we don’t recommend), Outlook for Mac & Windows (free method), and professional software (which we recommend here).
Q. What platform do I need to apply the conversion instructions?
Ans. For the free method, you will need both Mac & Windows OS. Whereas, for the professional method, you only require one OS with an OLM file.
