Google Workspace Migration to Office 365 – Complete Guide


Google Workspace Migration for Microsoft 365 is not an easy job. Many users have difficulty during the data migration. So, in this blog, I am going to explain how to use the native tool to transfer your Google Workspace data to Microsoft 365. I will also provide post-migration tips to keep your data after migration safe.
Table of Contents
- Preparations Before Google Workspace Migration for Microsoft 365
- Google Workspace Migration to Office 365 with Native Method
- Challenges with Manual Migration from G Suite to Office 365
- Google Workspace Migration for Microsoft 365 – Simplified Option
- Software Steps to Transfer Google Workspace to Microsoft 365
- When is Google Workspace Migration to Office 365 Needed?
- Post-Migration Tips to Keep Data Secure
- Final Words
- Some Frequently Asked Questions
Google Workspace Migration to Office 365 is a critical process for every IT admin. It takes a lot of time, especially in businesses where even one small mistake can lead to data loss. Therefore, you must take several precautions before going through the process.
Preparations Before Google Workspace Migration for Microsoft 365
For the migration, preparations are very important. As you have to check which data you need to move, properly configure both accounts. So there would be no disturbances while going through the procedure. Follow this checklist.
- Enable API access in Gmail, Contacts, and Calendar through Google Cloud Console.
- To allow Microsoft to talk to Google, set up a service account in Google Cloud and download the JSON key file.
- Provide authorization to your service account’s Client ID with the necessary OAuth scopes.
- Don’t forget to enable IMAP access for all user accounts that are going to be migrated.
- Make sure your Microsoft 365 domain ownership is properly verified by a TXT file in the DNS provider.
- Create the user account corresponding to the Google Workspace user accounts.
- Each user account must have an active license to make their mailbox provisioned.
- Turn off Exchange archival or MRM policies temporarily so that new incoming data will not interfere during the migration.
- To prevent bounced emails during the migration. Set up routing subdomains.
- Check your data from Gmail, Google Drive, and Shared Drives and remove any unnecessary or duplicate data.
- Create a CSV file containing the source (Google) and destination (Microsoft) email addresses to migrate multiple users’ data.
- Inform all the users about migration, expected downtime, and changes before the procedure.
- Backup all your important data before starting the migration process.
After properly following this checklist, you can now go through the process to securely perform a Google Workspace Migration for Microsoft 365.
Google Workspace Migration to Office 365 with Native Method
There is a native method, Exchange Admin Center (EAC), that can help you transfer emails, contacts, and calendars by using an automated option. Before that, disable all Messaging Records Management and archival policies.
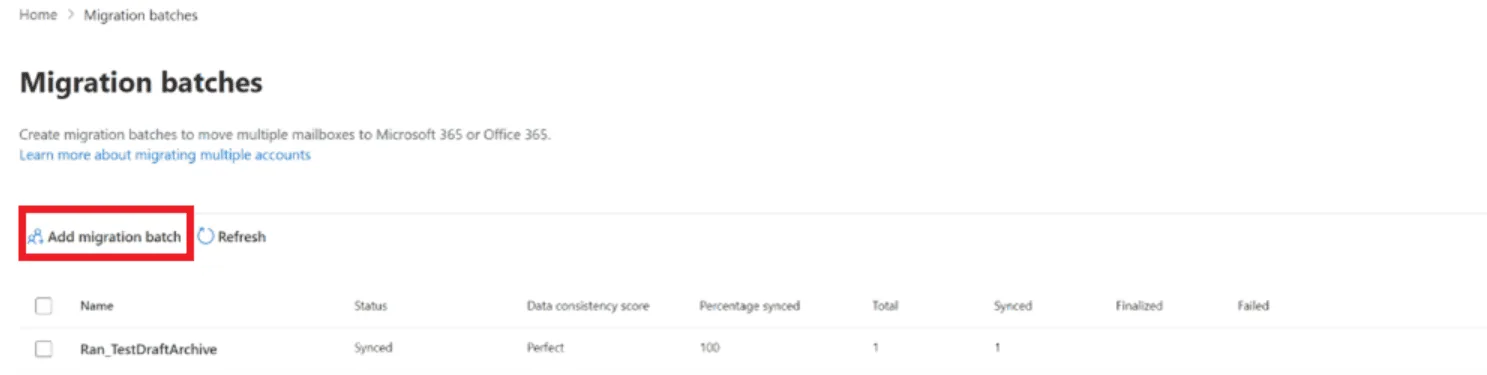
- First of all, go to the Exchange Admin Center. Click the Migration button.
- Select the Add migration batch button.
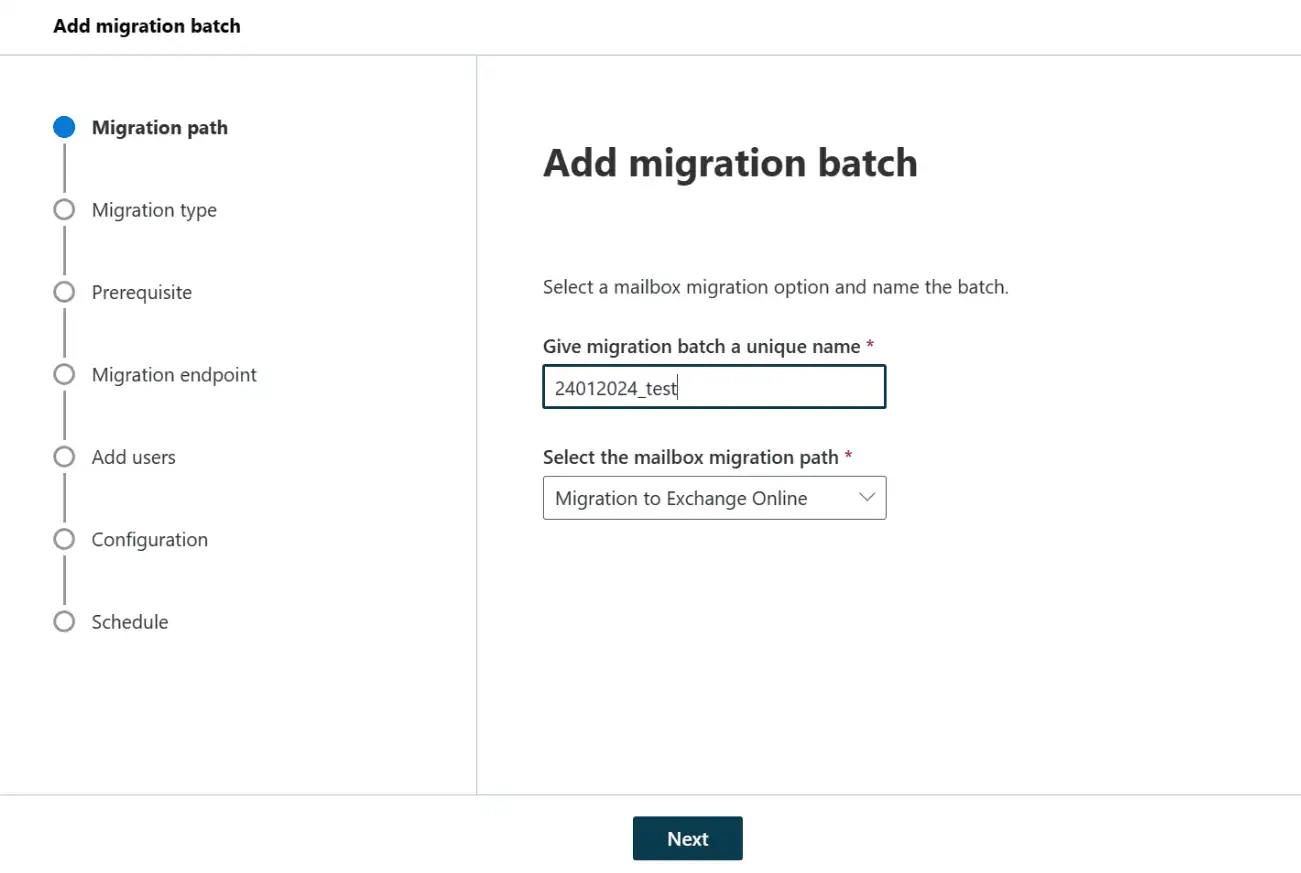
- In the Add Migration Batch page, enter the Unique Name and select Migration to Exchange Online. Then, click the Next button.
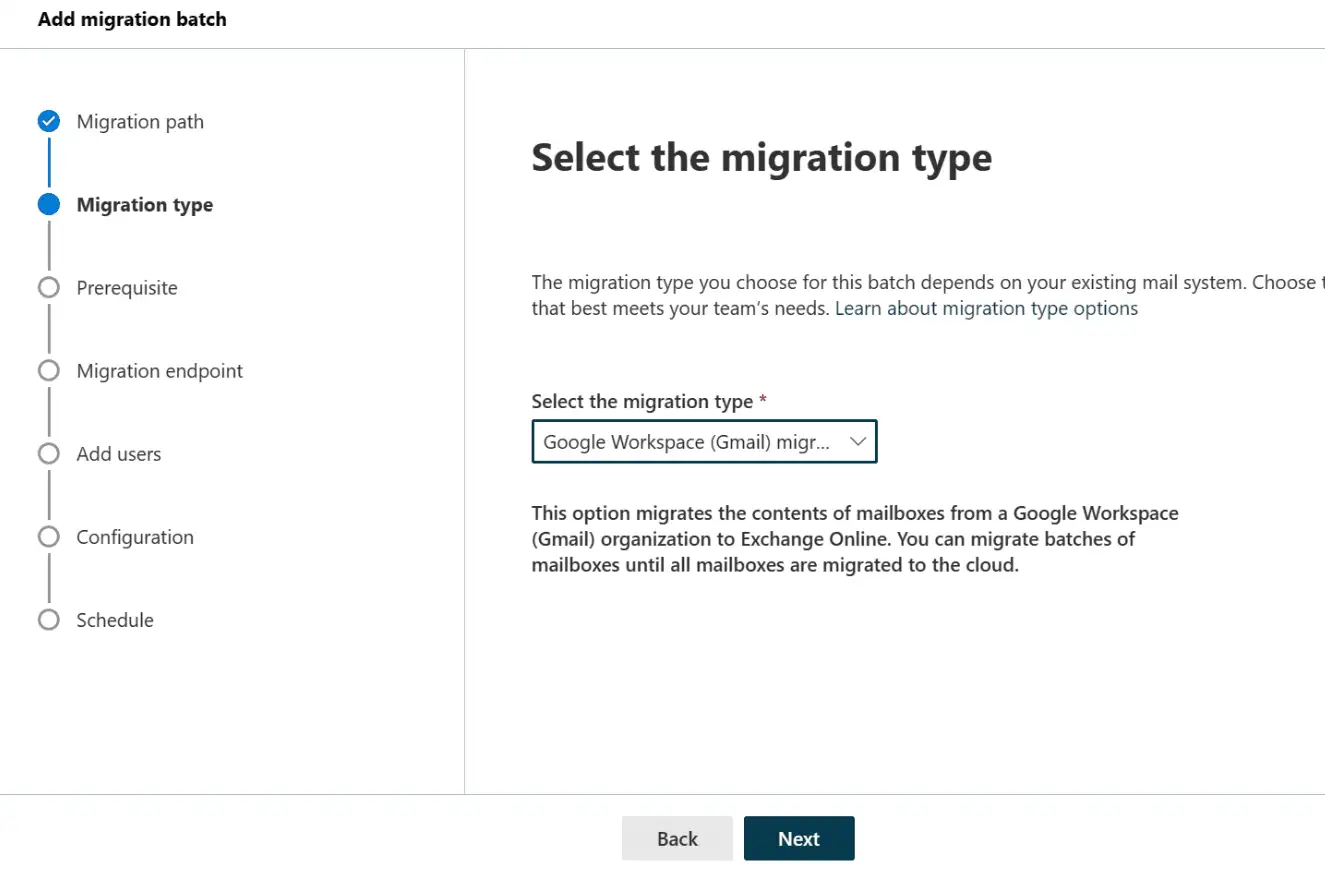
- Go to the Select Migration Type page. Choose the Google Workspace (Gmail) migration option. Hit Next.
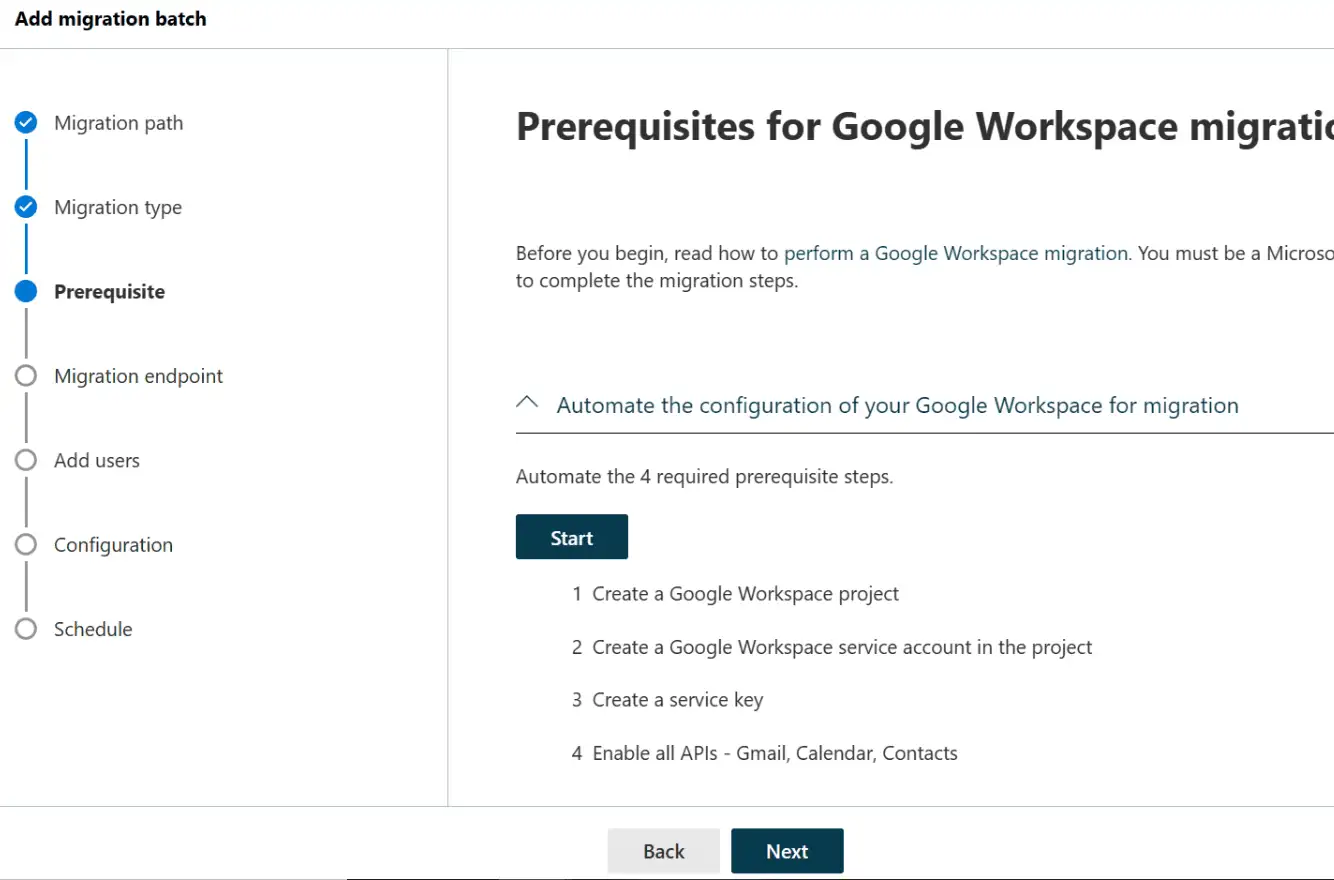
- In the Prerequisite page, expand the Automated configuration of your Google Workspace for migration. Click the Start button to automate the four required steps. After that, click Next.
- Sign in to the Google account for the validation of the API.
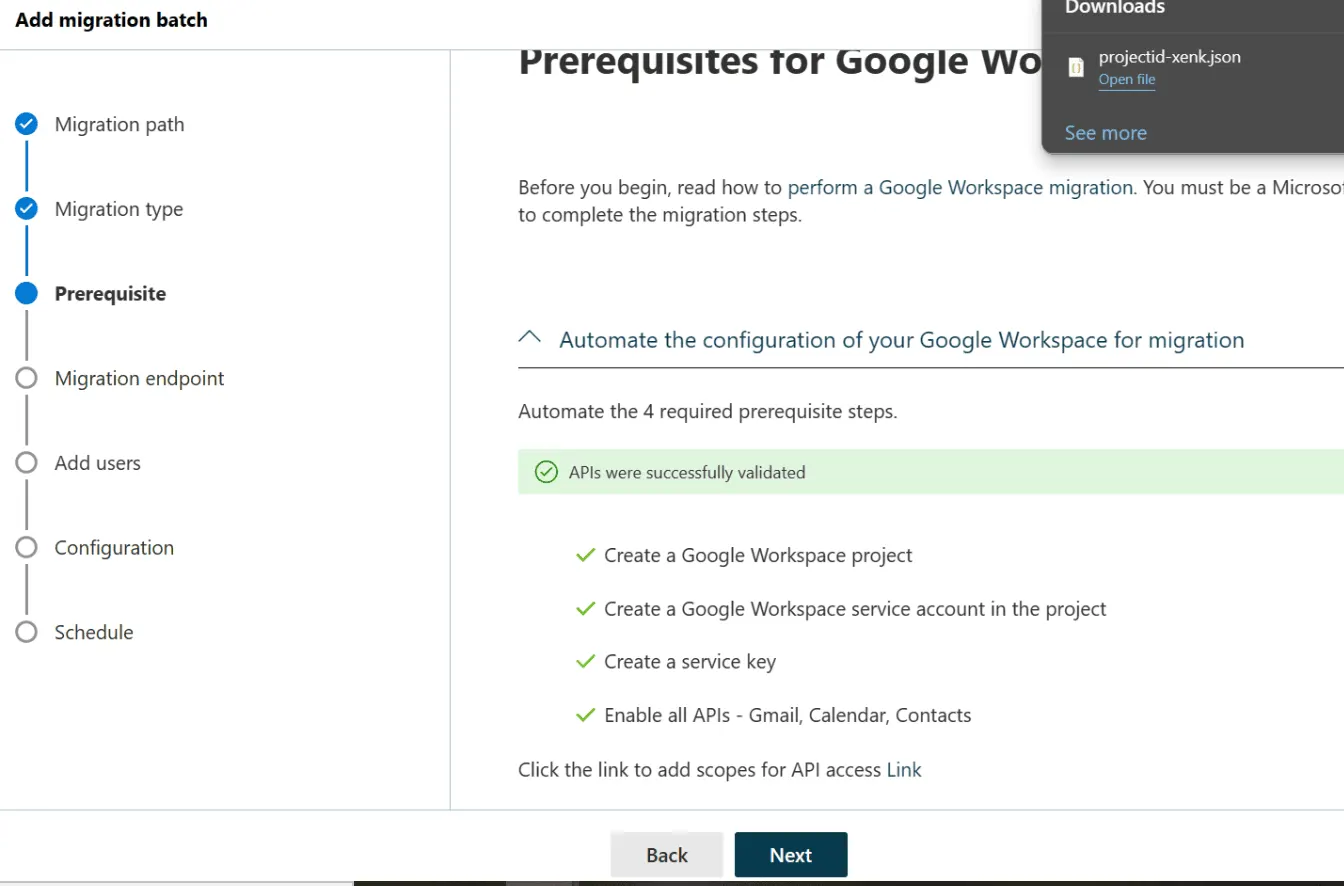
- Select the API access link to redirect to the Google Admin API Controls page.
- Click the Add new button. Copy the Client ID and Scope from EAC. Paste the Client ID and then choose the Authorize option.
- After setting up four prerequisite steps. Press Next.
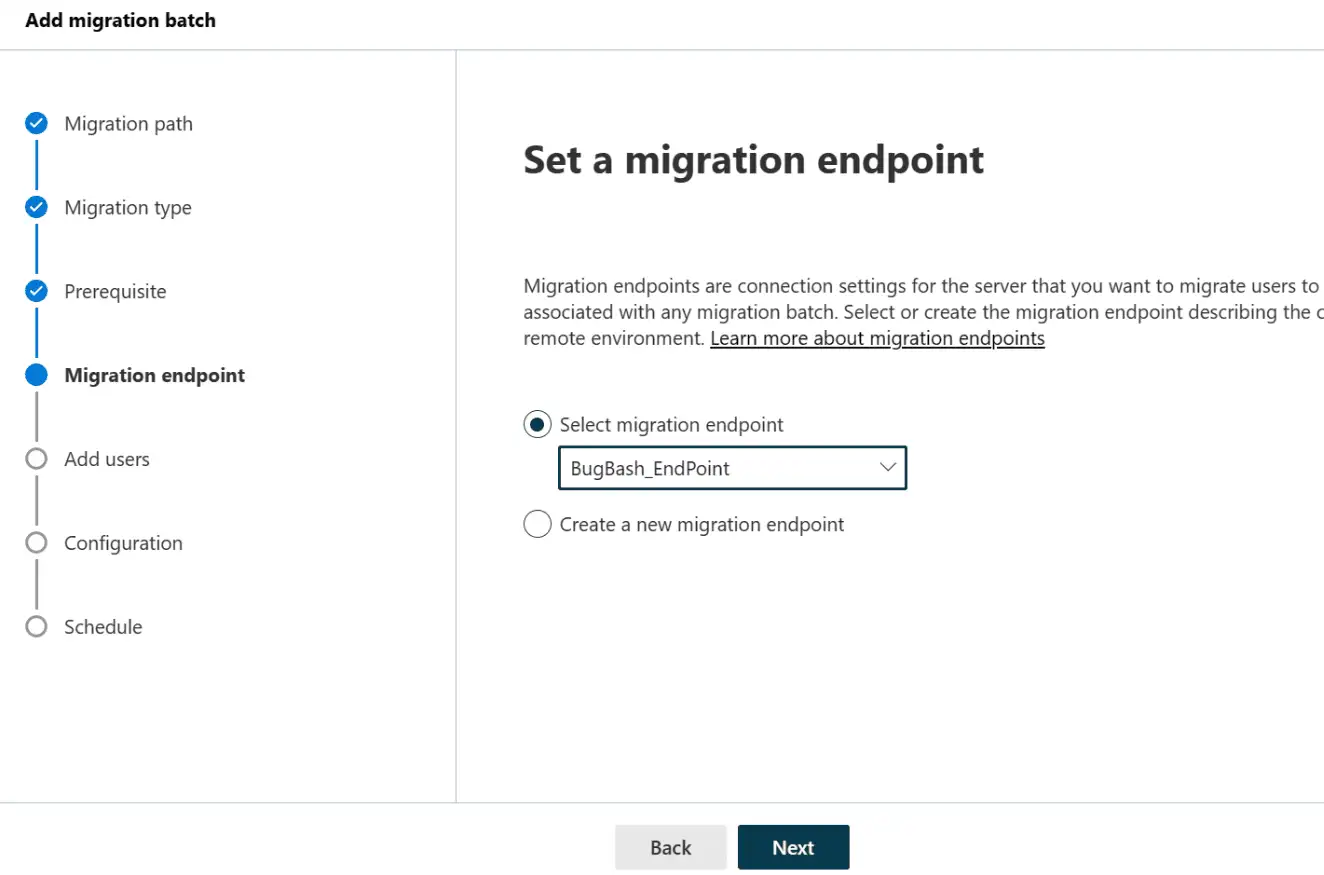
- Choose the migration endpoint or create a new migration endpoint if you are a first-time user.
- Import the CSV file that is saved on your desktop. Click the Next button.
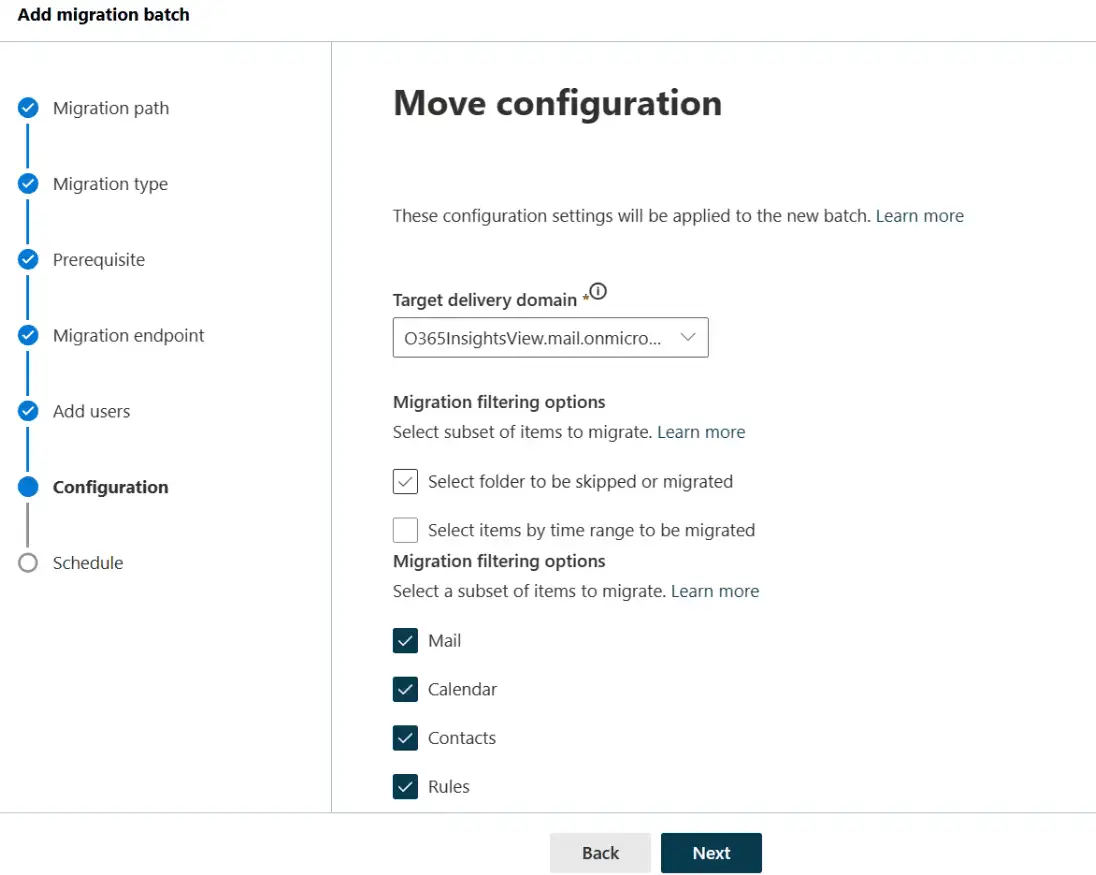
- Select the target delivery domain, then hit Next.
- On the next page, verify all the details. Press the Save button and click Done.

Challenges with Manual Migration from G Suite to Office 365
The manual approach, as described above, can be quite complicated and time-consuming for some users. Although the process is easy, it still leads to several challenges, such as
- This process is complicated, as it requires you to log in to Google Admin Console, grant permissions, and API authorization. So, non-IT users get stuck in the API validation stage.
- Using this method is difficult for large migrations, as you may get generic errors for any failures.
- During the migration of large volumes of data, it will slow down the performance of your desktop.
- The complete process depends on Google API, Domain-wide delegation, or OAuth authorization. If the API access is restricted or security policies block access, the migration will fail.
- There is a risk of data loss because of calendar sync issues or contact mismatches.
- This method does not fully support Google Drive data, Docs, Sheets, and Slides files.
- For beginners, this method is overwhelming as you need a lot of requirements like Admin consoles, APIs, and DNS.
That’s why many experts or IT admins prefer a professional tool for a more simplified process and fewer problems.
Google Workspace Migration for Microsoft 365 – Simplified Option
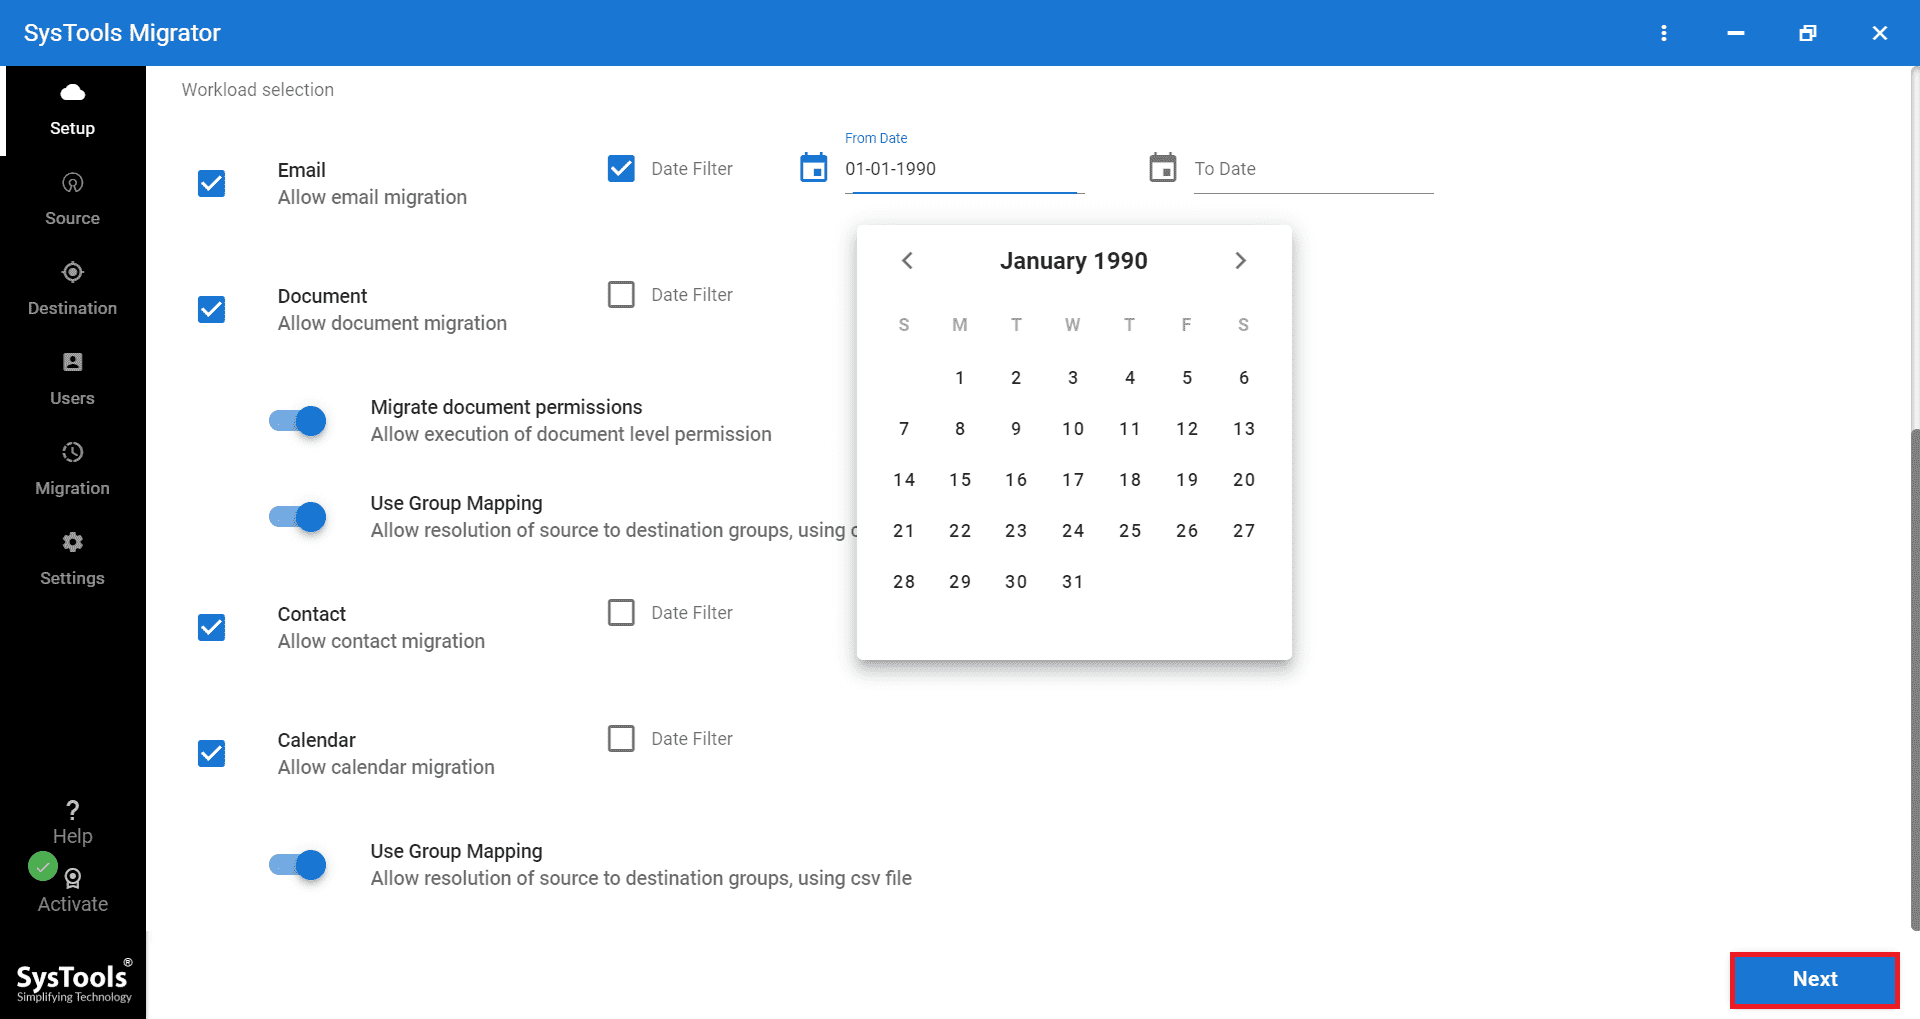
Users can easily migrate Google Workspace emails, contacts, calendars, and documents into the Office 365 domain with the help of the Google Workspace to Microsoft 365 Migration Tool. This software is great for transferring a huge load of data while keeping the original data intact. Here, you have a date filter option to transfer selective data easily. If you failed to migrate data in the initial process. This tool provides you with re-run migration options: Retry failed items, Re-run full migration, and Delta migration. To know how the software works, follow the steps below.
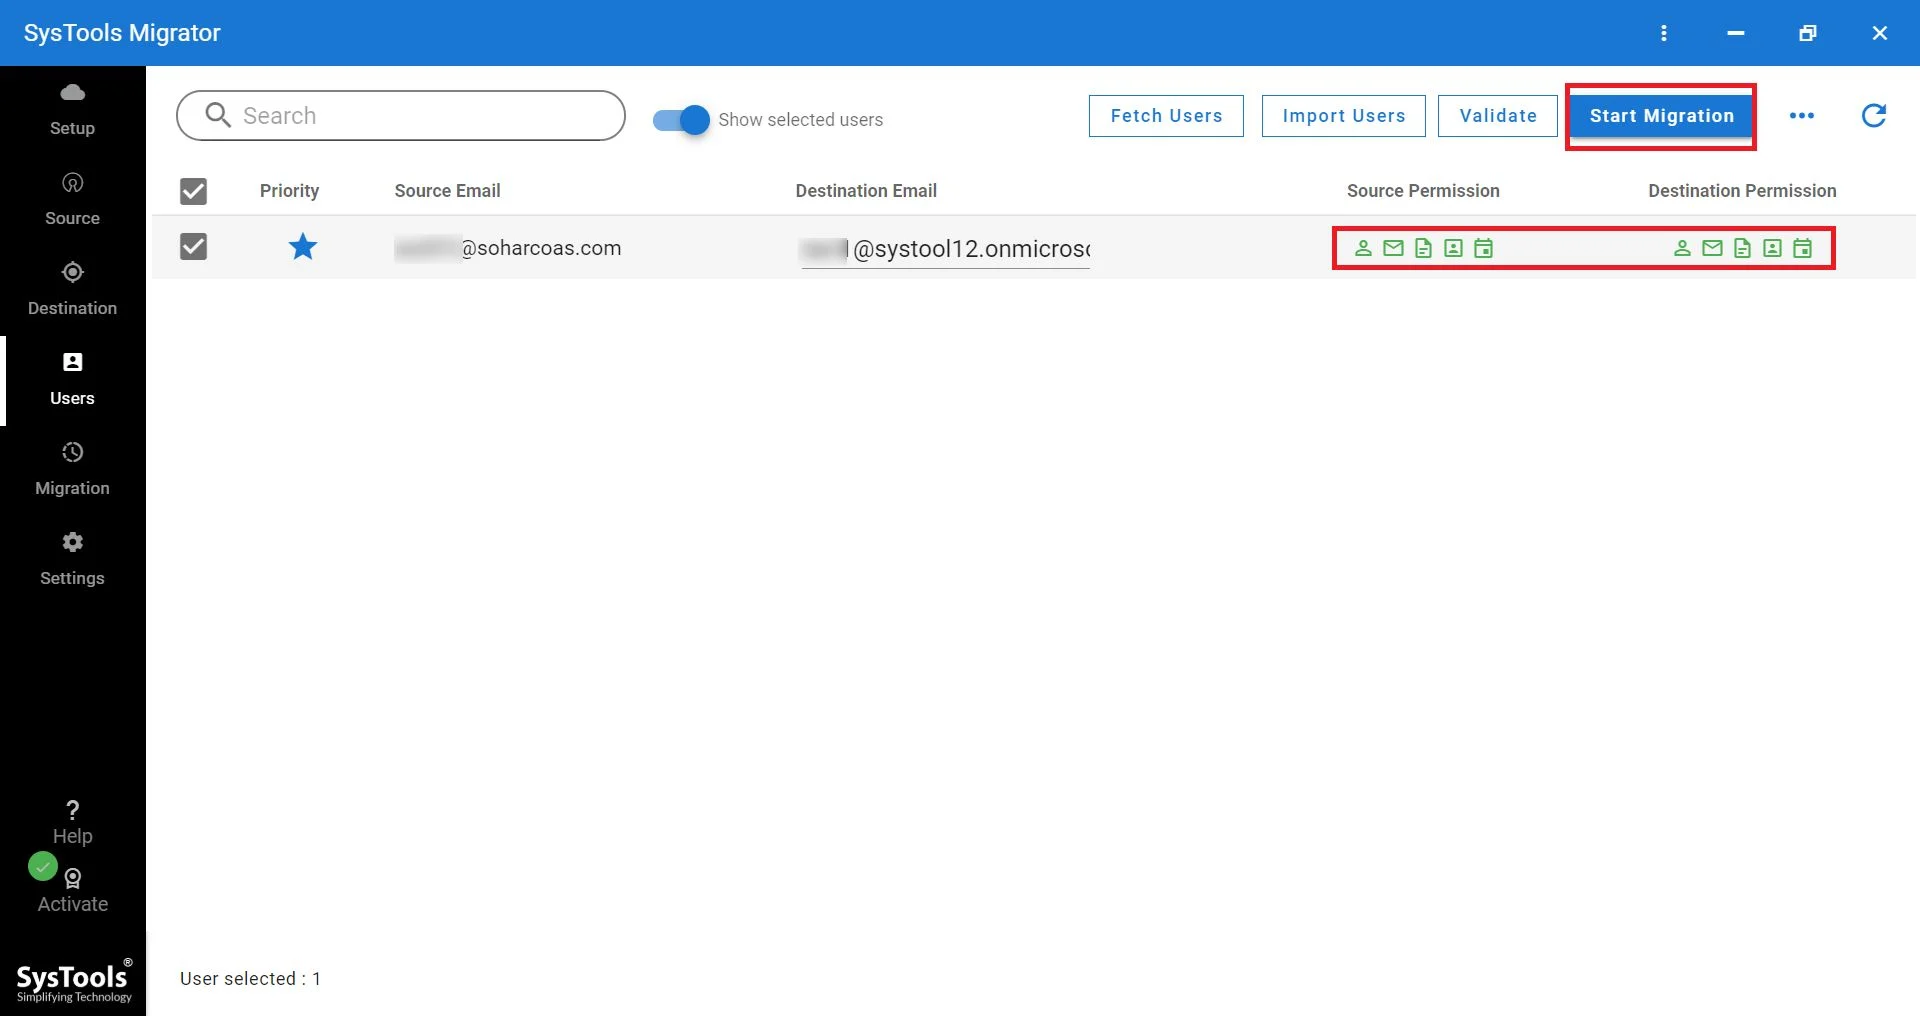
Software Steps to Transfer Google Workspace to Microsoft 365
- Download and install the software and then run it.
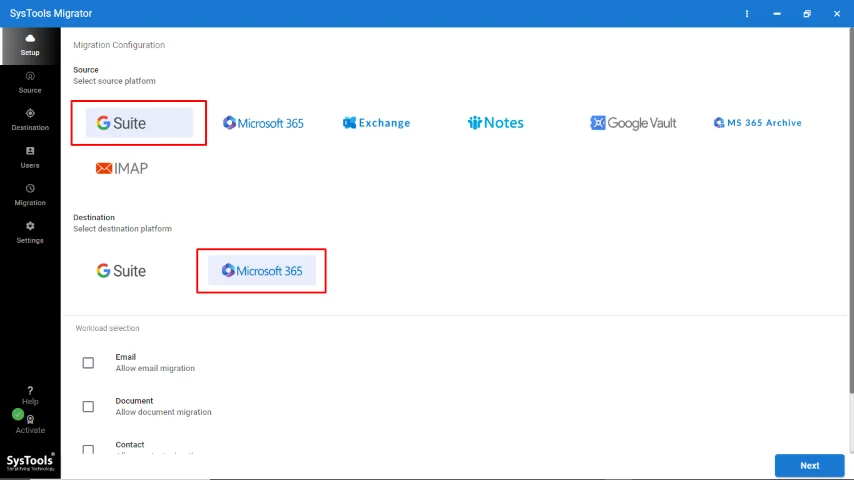
- Select ‘G Suite‘ and ‘Microsoft 365‘ as Source and Destination, respectively.
- Select the ‘Category’ that you want to migrate and apply filters.
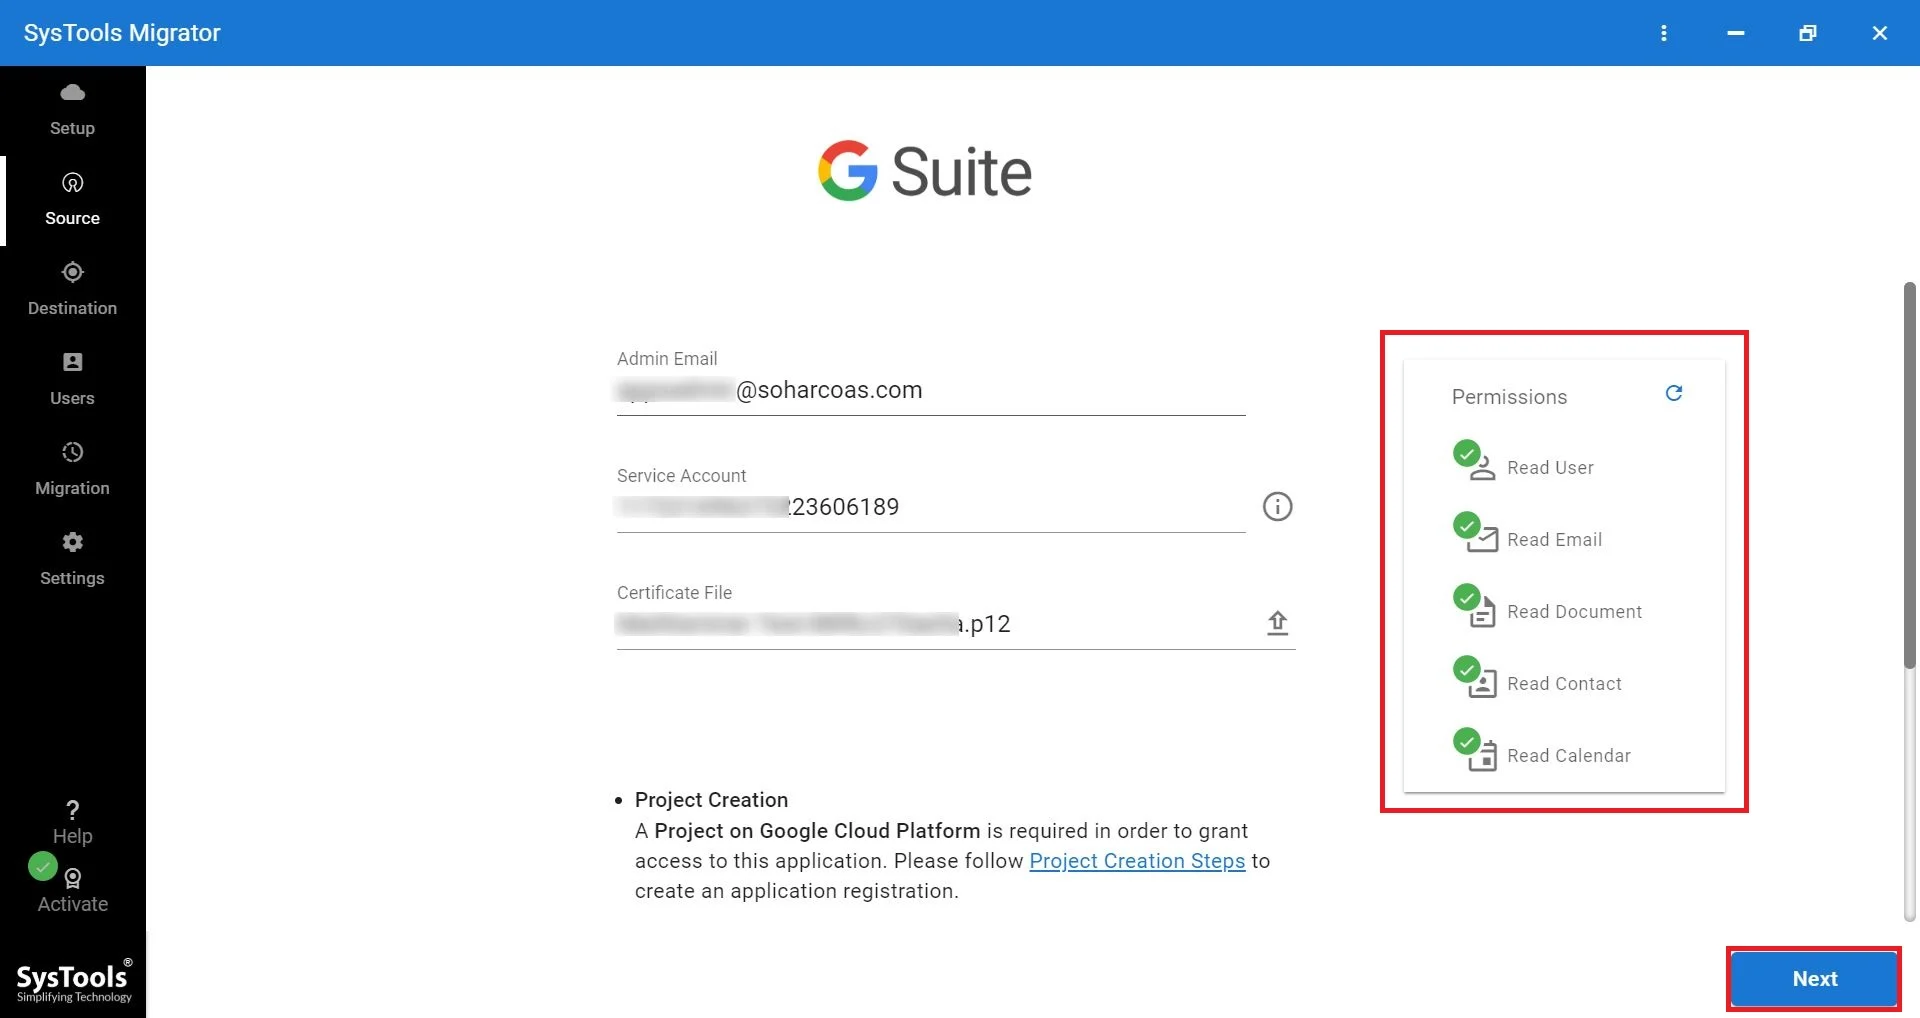
- Carefully fill out the details for G Suite as a Source. Then, click on ‘Next‘.
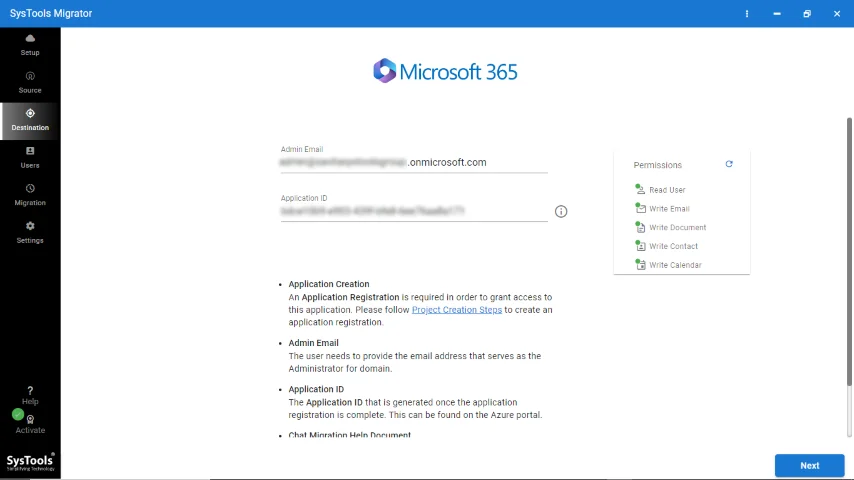
- Now, move to the Destination Screen and fill out the details carefully.
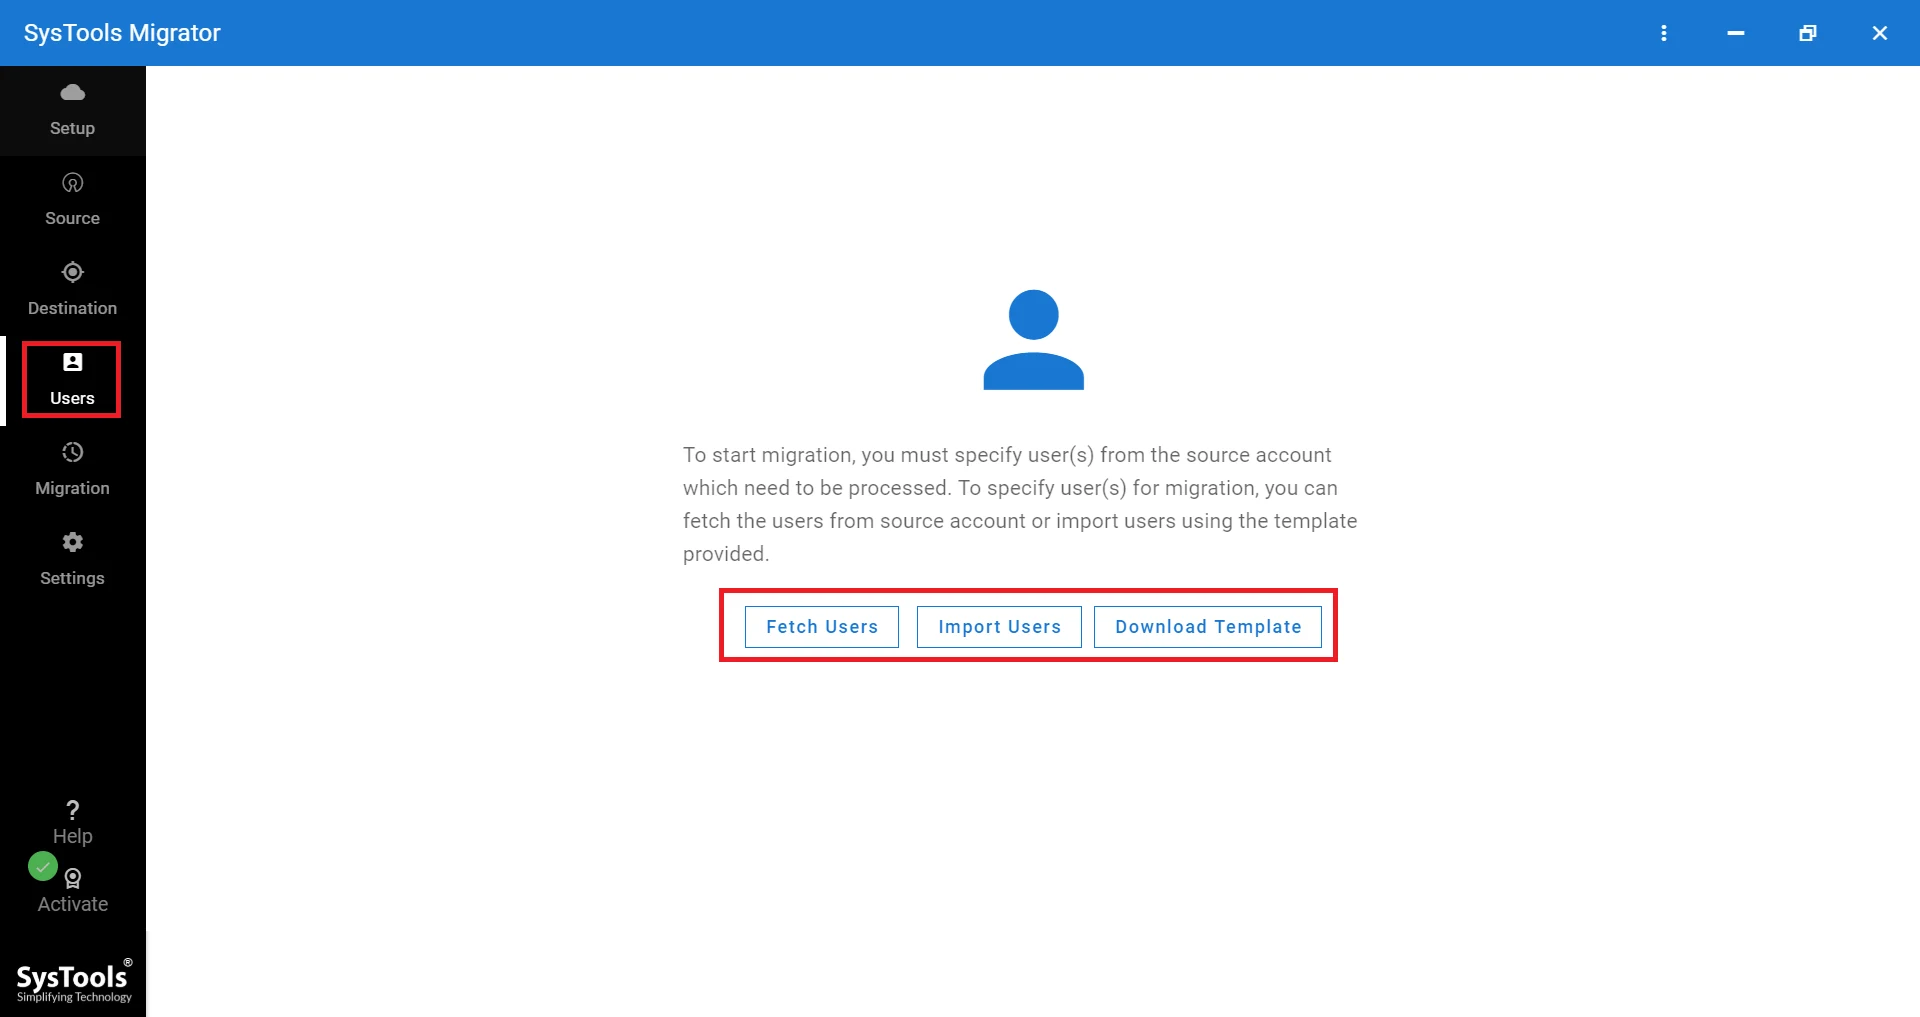
- Now, choose the option to get a list of users to migrate from G Suite to Office 365.
- Validate the users and click Start to migrate G Suite to Office 365.
When is Google Workspace Migration to Office 365 Needed?
With these methods, you can transfer your data, but you may not know when there is a need for migration. Below are the scenarios where you are required to use these options to move your data in the account.
- When your business relies mostly on Microsoft apps like Outlook, Word, or Excel. It would be best to move your Google Workspace data for easy work.
- Google Workspace provides you with basic email functions. But with Microsoft 365, you can share mailboxes, use advanced inbox rules, and implement better archiving and retention policies.
- For enterprise-grade security and compliance features, Microsoft 365 is a better option.
- Google Workspace completely depends on internet connections. But with Microsoft, you will get a desktop-based application that allows you to work offline.
- When the company merges or acquires another business, they have to move their data from one platform to another as part of the shifting process.
- Some users prefer Microsoft 365 functions to the Google Workspace.
These are the common scenarios where you need to transfer your data. Now, simply moving them is not the end. You also have to manage and protect them from any future issues. For this, below are the precaution tips that you must know.
Post-Migration Tips to Keep Data Secure
Data security is a top priority for everyone. So, below are the tips that make it easier for you to manage the data.
- Make sure you activate Multi-Factor Authentication for additional security if the login credentials are compromised or to prevent unauthorized access.
- Set up Data Loss Prevention policies to keep the sensitive information from being shared.
- From protecting against cyber threats, using the Microsoft Defender for Office 365, anti-phishing, and anti-malware policies,
- After migration, check your emails, contacts, and calendars for missing or duplicate data.
- Create a backup of your Microsoft 365 data to protect against accidental deletion or ransomware.
- Regularly monitor audit logs and user activity to track user actions, detect suspicious activity, and maintain compliance.
- Update DNS and MX records to make sure proper mail flow.
- Train your employees about phishing attacks, password management, and secure file sharing to prevent human error.
These steps make your account secure and smooth-running.
Final Words
Many users wish to switch from G Suite to Microsoft 365 to increase scalability and productivity. However, they were unable to find a reliable method to do so. Therefore, in this article, we demonstrated both the official and automated methods to perform G Suite to Office 365 migration step by step. You can select and implement any method as per your preference. However, to save time and effort and ensure a successful migration, it is suggested to use the migration tool.
Some Frequently Asked Questions
Q. How to use this tool to migrate G Suite to Microsoft 365? A. Here are the 5 steps to perform a G Suite to Office 365 migration safely:
- Step 1. Download, Install, & Run Software on PC.
- Step 2. Choose Required Migration Platforms.
- Step 3. Select Desired Workload & Apply Filter.
- Step 4. Log in with Valid Credentials & Validate.
- Step 5. Create Mapping & Click on the Start Button.
Q. Does this tool ensure data security while migrating?
A. Yes, this tool guarantees 100% data security. None of it will be manipulated after the migration is completed successfully.
Q. Will there be duplication of data while performing the Delta migration?
A. No, by using delta migration, only the newly arrived data between the same drives will get migrated. There will be no duplication.
Another Migration Scenario: How to Switch from Office 365 to G Suite?
