How to Transfer Mac Mail to Outlook? Complete Guide


Summary: In this article, we will show you how to transfer Mac Mail to Outlook by following these simple steps. The method given here supports all the MBOX files generated by Mac OS X Tiger, Mac OS X Leopard, Mac OS X Snow Leopard, Mac OS X Lion, Mac OS X Mountain Lion, Mac OS X Mavericks, Mac OS X Yosemite, Mac OS X El Capitan, macOS Mojave.
Are you the one who want to migrate Apple Mail to Outlook but don’t know how to do this ? If your answer is YES, then this article is just meant to you. So, let’s begin with a quick introduction to both email clients and take a quick look on the reasons to perform this migration.
- Apple Mail is a default email client that comes pre-configured with every Mac OS X 10.0 and later machine. It is an eminent emailing service offered by Apple that allows users to send / receive emails over the Internet, manage contacts, schedule meetings, and set reminders.
- Outlook for Mac is another amazing personal information manager designed by Microsoft that can be used as an email application, contact manager, task manager, note taker and so much more. It is designed for almost all types of OS X including Windows and Mac OS X.
Table of Contents
- Primary Reasons to Migrate Apple Mail to Outlook
- How to Transfer Mac Mail to Outlook?
- Import Apple mail to Outlook Using EML Files
- Transfer to Outlook Using IMAP Account
- Export Mac Mail Emails to Outlook
- All-In-One Guide
- FAQs
Primary Reasons to Migrate Apple Mail to Outlook
- Apple Mail is not very good at archiving Inbox emails due to which sometimes the archive emails appear into Inbox folder.
- Apple Mail does not provide an option to forward emails and it makes it difficult for users to work with it.
- There are no new features included in Apple Mail in past years while other email clients like Outlook is loaded with so many handy features to make email management easier for the end-users to transfer Mac mail to outlook.
- Microsoft Outlook is easy to use, comprises an attractive GUI and provides high-level security.
How to Transfer Mac Mail to Outlook? Manual Method 1
The complete process to import Apple Mail to Outlook Mac is divided into three major steps and it is recommended to follow the guidelines sequentially to avoid any kind of data loss.
Step 1. Export MBOX from Apple Mail
- Launch Apple Mail application on your Mac machine and select all the mailboxes you want to export as MBOX.
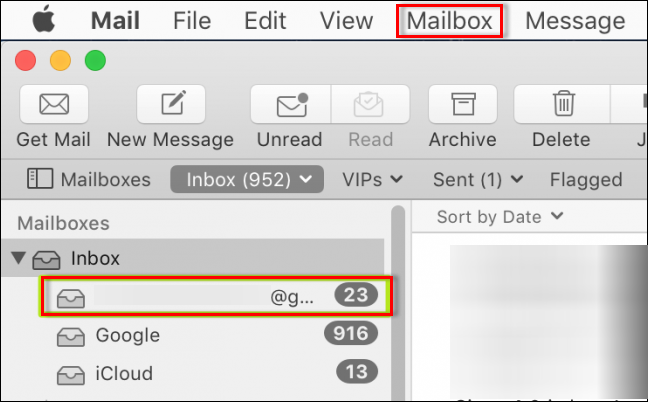
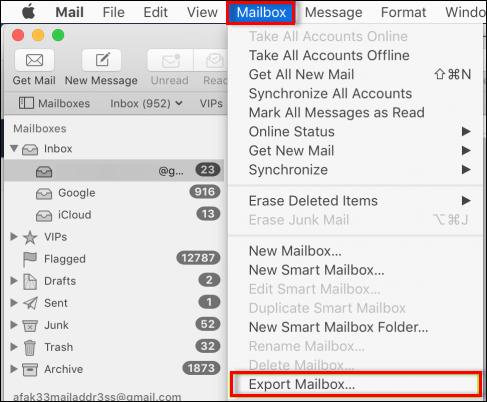
- Click on Mailbox >> Export Mailbox.
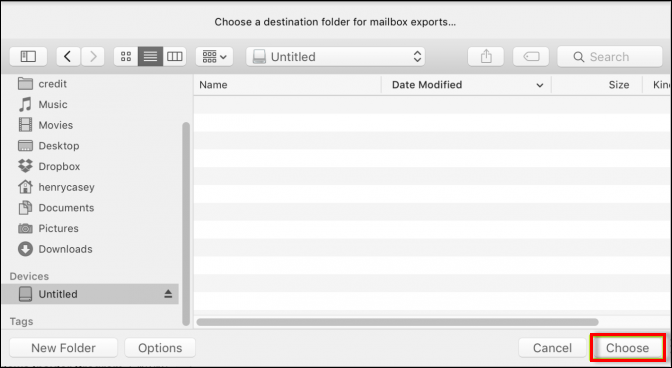
- Select an existing folder or create a new folder to save the exported MBOX and click Choose.
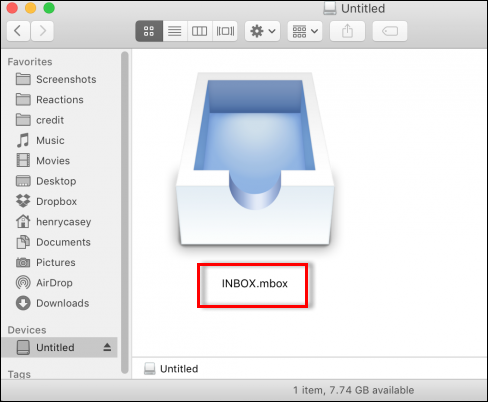
- Navigate to the destination location and you will get the exported MBOX there.
Step 2. Using an Intermediate Email Client:
- Export Mailbox from Mac Mail.
- Open Mac Mail.
- Right-click on the mailbox you want to export and select Export Mailbox.
- Choose a location where you want to save the exported .mbox file.
- Then, Install Thunderbird and add the ImportExport NG tools add-on feature.
- Import the .mbox file to Thunderbird.
Step 3. Export from Intermediate Client to Outlook:
- Use Thunderbird’s built-in features to export emails to a format that Outlook can import, such as .pst extension.
- Now, you have successfully done the process of transfer Mac mail to outlook.
Import Apple Mail to Outlook Using EML Files – Manual Method 2
This method involves the steps for exporting emails as EML files and then importing them into Outlook.
Step 1. Export Emails as EML from Mac Mail:
- Open Mac Mail.
- Select the emails which you want to transfer.
- Drag and drop the selected emails to a folder on your desktop. This will save them as .eml files.
Step 2. Import EML Files to Outlook:
- Open Outlook.
- Drag and drop the .eml files from your desktop folder into the desired Outlook folder.
Transfer Mac Mail to Outlook Using IMAP Account – Manual Method 3
This method offers an IMAP email account to synchronize emails between Mac Mail and Outlook.
Step 1. Set Up IMAP Account in Mac Mail:
- Open Mac Mail.
- Go to Mail > Preferences > Accounts.
- Add your IMAP email account (e.g., Gmail, Yahoo, etc.).
Step 2. Copy Emails to IMAP Account:
- Drag and drop emails from your local folders in Mac Mail to the folders under your IMAP account. This will upload your emails to the IMAP server.
Step 3. Set Up IMAP Account in Outlook:
- Open Outlook.
- Go to File > Add Account.
- Enter the same IMAP account credentials and set up the account.
Step 4. Copy Emails to Outlook Folders:
- In Outlook, once the IMAP account is synced, you will see the emails which you have transferred.
- Drag and drop these emails from the IMAP folders to the desired folders in your Outlook account.
Manual Method to Export Apple Mail to Outlook:
To successfully complete this solution users need to have access to four different email clients on the same Mac system which are Apple Mail, Eudora, Outlook Express, and Microsoft Outlook. After successfully setting up these accounts on your system you can transfer Mac Mail to Outlook following this four step process.
- The first step is to export your emails from Apple Mail as MBOX files.
- Next, use Eudora to rename the MBOX data files into the .mnx extension and then copy it into the email client’s local directory.
- Now users have to import these email messages using Eudora’s native import option into the Outlook Express application.
- In the final step, users can use MS Outlook’s inbuilt feature in order to transfer the email files from Outlook Express.
The major disadvantage of this manual process is very time consuming and also requires good technical knowledge in order to complete the transfer process successfully without data loss, hence it isn’t an ideal choice for most of the users.
Also Read: How to Download IMAP to PST on Mac?
All-In-One Guide
Transfer Mac Mail to Outlook is one the most asked queries by Mac Outlook users. In this article, we have disclosed a very simple technique to accomplish Import Apple Mail to Outlook within a few simple clicks. If you want something unique you can go with MBOX to PST Converter which allows users to convert their MBOX files into multiple file formats such as PST, EML, PDF, MSG, HTML, etc.
FAQ (Frequently Asked Questions)
Q) Can I add Apple Mail to Outlook?
Select Accounts > Email accounts. From the email accounts section, select the option to add a new account. Select Add Account, in the Suggested account dropdown, enter the iCloud account which you want to add, and select Continue. On Sync your iCloud account, click on Continue.
Q) Can I transfer Mac Mail to Outlook without using third-party tools?
Yes, you can transfer your emails using the IMAP method or by manually forwarding emails. However, these methods can be time-consuming and may not preserve all email attributes.
Q) Can I import Mac Mail emails into Outlook on Windows?
Yes, you can transfer emails from Mac Mail to Outlook on Windows by first exporting the emails to an MBOX file, converting it to a PST file, and then importing it into Outlook on Windows.
