Restoring PST File of a POP3 Account


It’s really an easy work to restore PST file in Outlook 2013 and connect with POP3 Account. There are many other ways to do this, but we are going to use Account Settings to restore PST file and connect to server using POP3 Account. We can restore PST file over the existing PST and make restored data file a default. Let us, see the following steps of PST File restoration with pictorial representation.
-
- Firstly, we would open Microsoft Outlook 2013 for this and you will see similar screen as shown in fig 1. Then you need to click on File tab at top-right corner of MS Outlook.
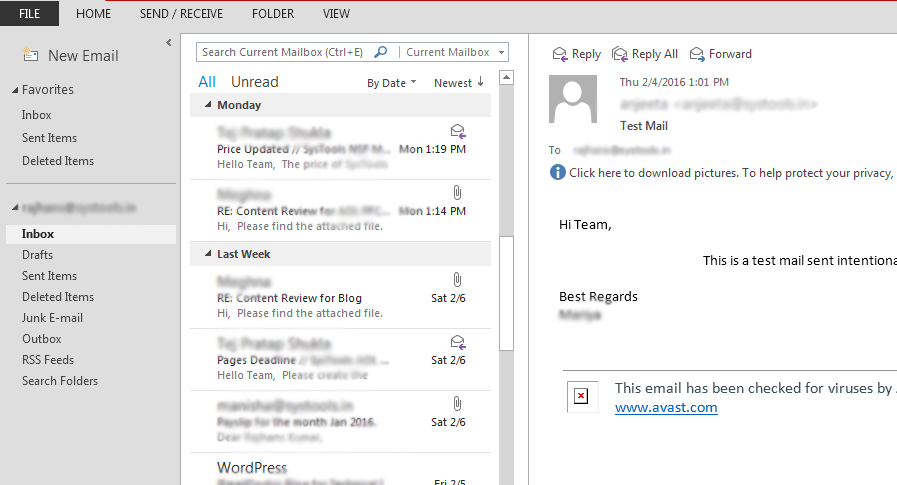
Figure 1: MS Outlook 2013
- Then you will see “Info” tab is already selected. Now you just need to click on “Account Setting” then again select “Account Setting” as displayed in fig 2.
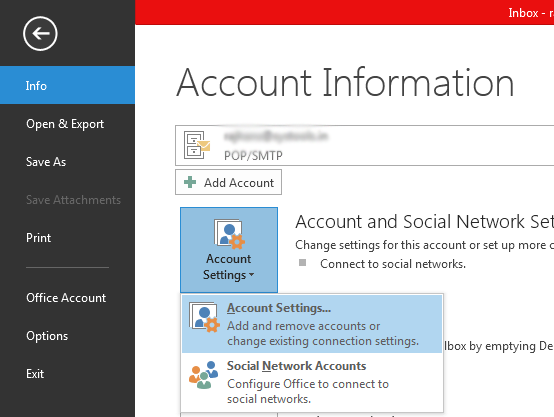
Figure 2: Account Information (Select Account Setting)
- Now you will see a new window of Account Settings and in this window “Email” tab is already selected as similar figure shown in fig 3.
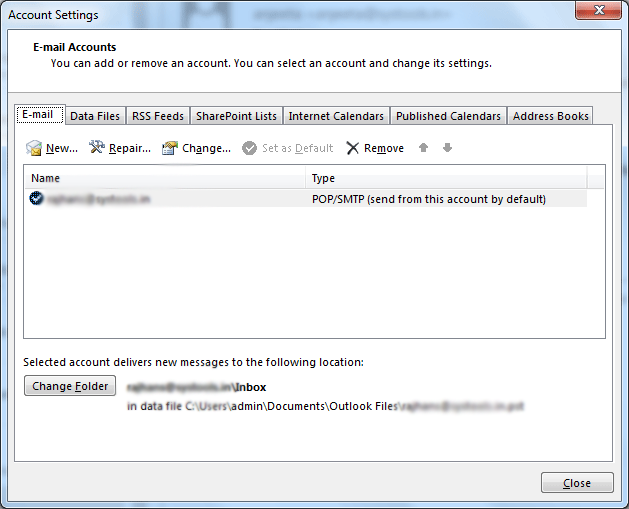
Figure 3: Account Setting
- Firstly, we would open Microsoft Outlook 2013 for this and you will see similar screen as shown in fig 1. Then you need to click on File tab at top-right corner of MS Outlook.
-
- You just need to select “Data Files” tab as you can see in fig 4. Now you need to click on “Add” button and select your PST file, which you want to restore from its location and click on “OK” button as shown in fig 5. Now you can see the new PST file listed in the list as shown in fig 6. You can set the new listed file as default by clicking on “Set as Default” button shown in fig 7.
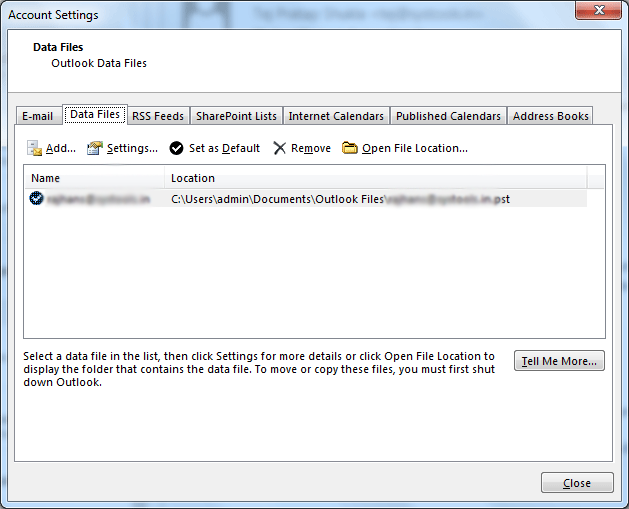
Figure 4: Data Files Tab
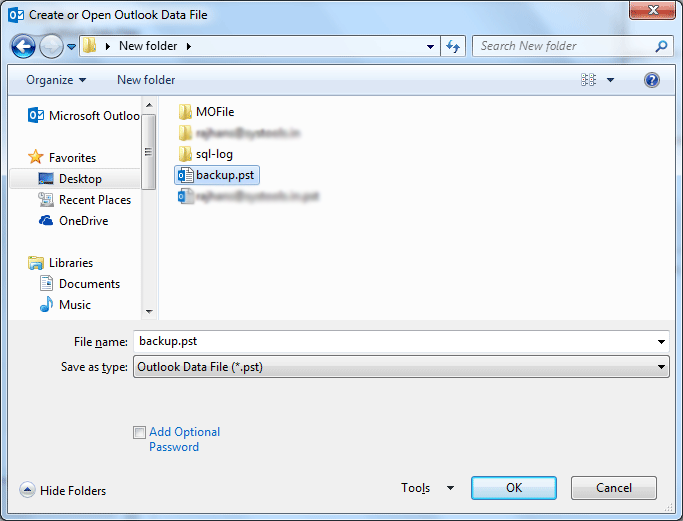
Figure 5: Select PST File
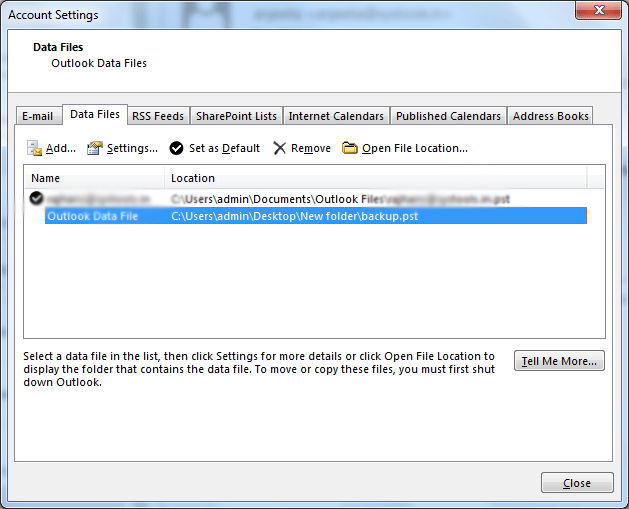
Figure 6: New PST File Listed
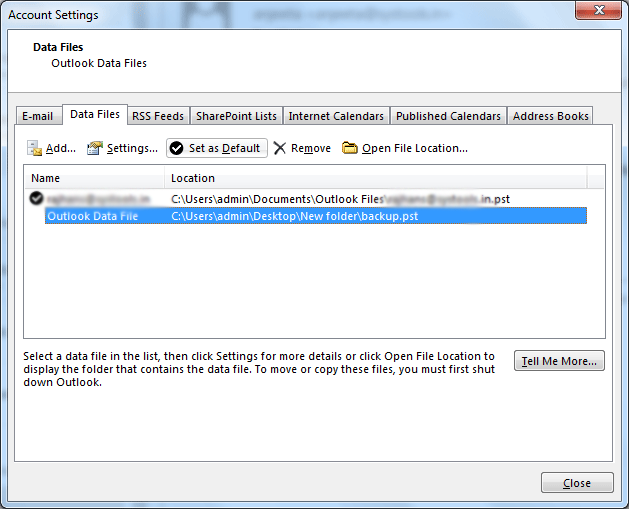
Figure 7: Set Default PST File
- You just need to select “Data Files” tab as you can see in fig 4. Now you need to click on “Add” button and select your PST file, which you want to restore from its location and click on “OK” button as shown in fig 5. Now you can see the new PST file listed in the list as shown in fig 6. You can set the new listed file as default by clicking on “Set as Default” button shown in fig 7.
- If you want to change, your incoming mail location then you can go at Email tab again; click on “Change Folder” button from down-left corner of E-mail Accounts window, and select any folder or you can create a new folder and then just click on “OK” button.
- Now you can see your newly added PST file in Outlook as displayed in fig 8.
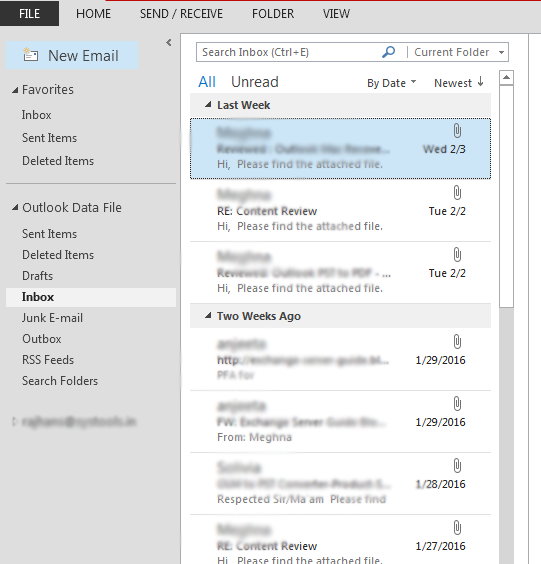
Figure 8: New Added PST File as Default
Conclusion
In this blog, we have discussed about restoring PST file using POP3 Account. We can also import backup data from PST file in another way.
