How to Import Backup Email Files in Outlook 2013 ?


It is very easy to import Outlook backup data into Outlook 2013. You can do it in just some click of mouse. Let us see the import Outlook data backup process as defined below by which you can easily learn and understand the import process with help of pictorial representation of all the steps.
- Firstly, Open Microsoft Outlook 2013 and you will see the same interface as shown in fig 1. Now click on the File tab at the top right corner of Outlook 2013 window.
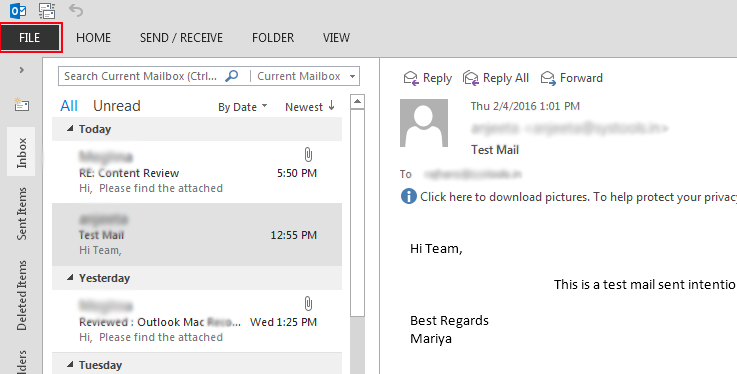 Figure 1: MS Outlook 2013
 - Now you will see the Info tab as already selected, showing your Account Information as shown in the fig 2.
 Figure 2: Account info
 - Now select Open & Export tab, right below the Info tab as shown in fig 3.
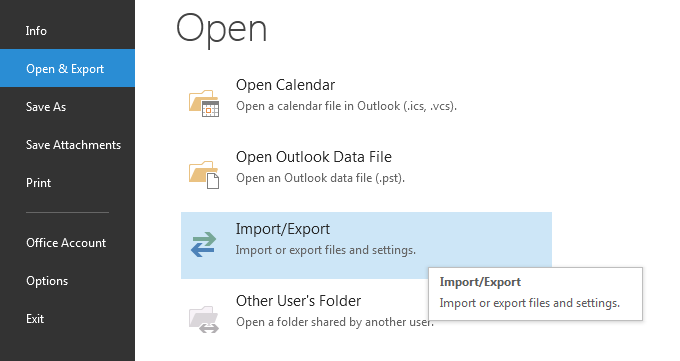 Figure 3: Open & Export
 - Now a new window “Import and Export Wizard” will open. In this window select “Import from Another Program or File” as shown in fig 4 and click on Next button.
 Figure 4: Import from File
 - Now you will see “Import a file” Just select Outlook Data File (.pst) in this window as shown in fig 5 and click on Next button.
 Figure 5: Outlook Data File
 - Now you will see “Import Outlook Data File” window. In this window, you will see default backup file location is already selected. If your backup file is at default location as shown in fig 6 then you can proceed by clicking on Next button. However, if your backup file is at different location then you need to click on Browse button. After clicking on Browse button you will see a new window “Open Outlook Data file” as shown in fig 7. Here you need to select Outlook backup file location.
 Figure 6: Import File
Figure 7: Select Location
- After selecting your Outlook backup data (PST) file location you will come to the same window “Import Outlook Data File” as you can see in fig 8. Here you need to select Replace “Duplicates with items imported” option from the listed radio buttons. Then just click on Next button to proceed.
 Figure 8: Backup Location
 - Now you will see “Outlook Data File Password” window if you have password protected backup file otherwise this window will not appear. You can see an image of the interface as shown in fig 9. Now enter the password of Outlook backup data file and click on OK button to proceed.
 Figure 9: Enter Password
 - Now you will see the same image as displayed in fig 10. Here you need to select a folder from which you want to restore your data, like: Inbox folder for inbox mail messages, Contacts for importing all outlook contacts etc. If you want to restore / import all Outlook data then you need to select root folder (Outlook Data File) as shown in fig 10 and keep Include Subfolders Checked. If you want to filter your data then you can click on Filter button otherwise keep default radio button selected and click on Finish button.
Conclusion
In this blog we have discussed about Importing / Restoring Outlook Backup Data (PST) File. You may also like our Outlook 2013 deleted email recovery solution in case of inaccessibility of your MS Outlook email.
