Move & Migrate Office 365 Domain to Another Tenant – Easy Steps


This article will explain to you how to move Office 365 domain to another tenant with email data while keeping the same domain name.
Basically, this task will be divided into four major steps –
- Step 1. Migrate Office 365 Domain Data to Target Tenant
- Step 2. Detach Domain from Source Office 365 Tenant
- Step 3. Attach Domain in the Target Office Tenant
- Step 4. Migrate Data from Same Office 365 Tenant to Domain
Domain migration is necessary while performing Office 365 to Office 365 migration, the whole procedure is complicated to perform, but the most challenging task is detaching the domain from the source (old) tenant and attaching it to the target (new) tenant.
We have to detach the domain from the old tenant before attaching it to a new tenant because the domain cannot be attached to two tenants at a time.
One more thing, the detaching domain will take two days, we cannot attach the domain to a new tenant during this time.
Let’s start the process and keep these things in mind.
Step 1. Migrate Office 365 Domain Data to Another Tenant
As we know the first step is to transfer Office 365 domain data to another tenant, but the question is how?
Currently, Microsoft does not provide any solution to do this task But, we can take the help of reliable software.
With this software, we can easily migrate data from Office 365 domain to another tenant without any complications. Apart from this, it provides multiple facilities such as –
- Move emails, contact, calendar, and documents.
- Concurrent migration option.
- Provides delta migration.
- Multiple options to Re-Run migration.
- Date-based filter option.
- User mapping option.
- Pause & resume a migration.
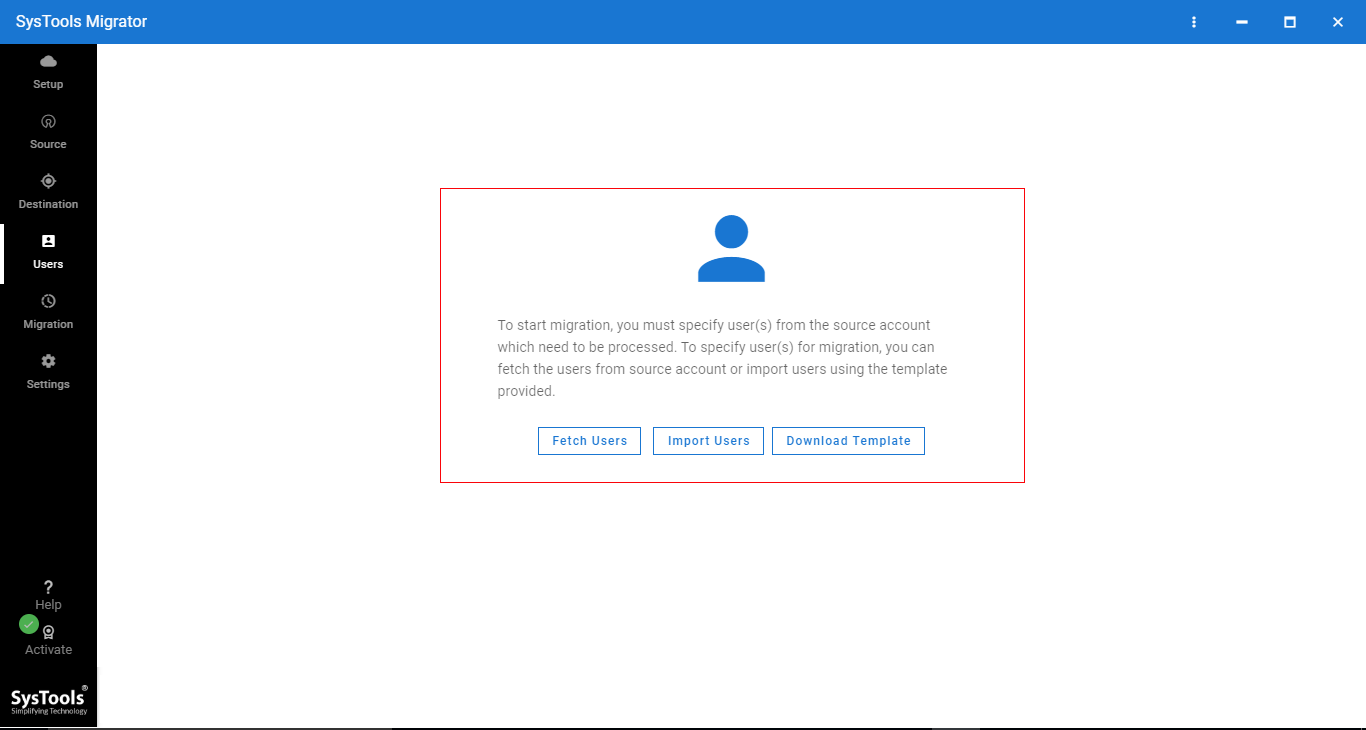
Download the software and follow the steps below to transfer Office 365 domain users’ data to another tenant.
In this step, we will move Office 365 domain users’ data to temporary accounts.
1.1. Select Office 365 as a source and destination.
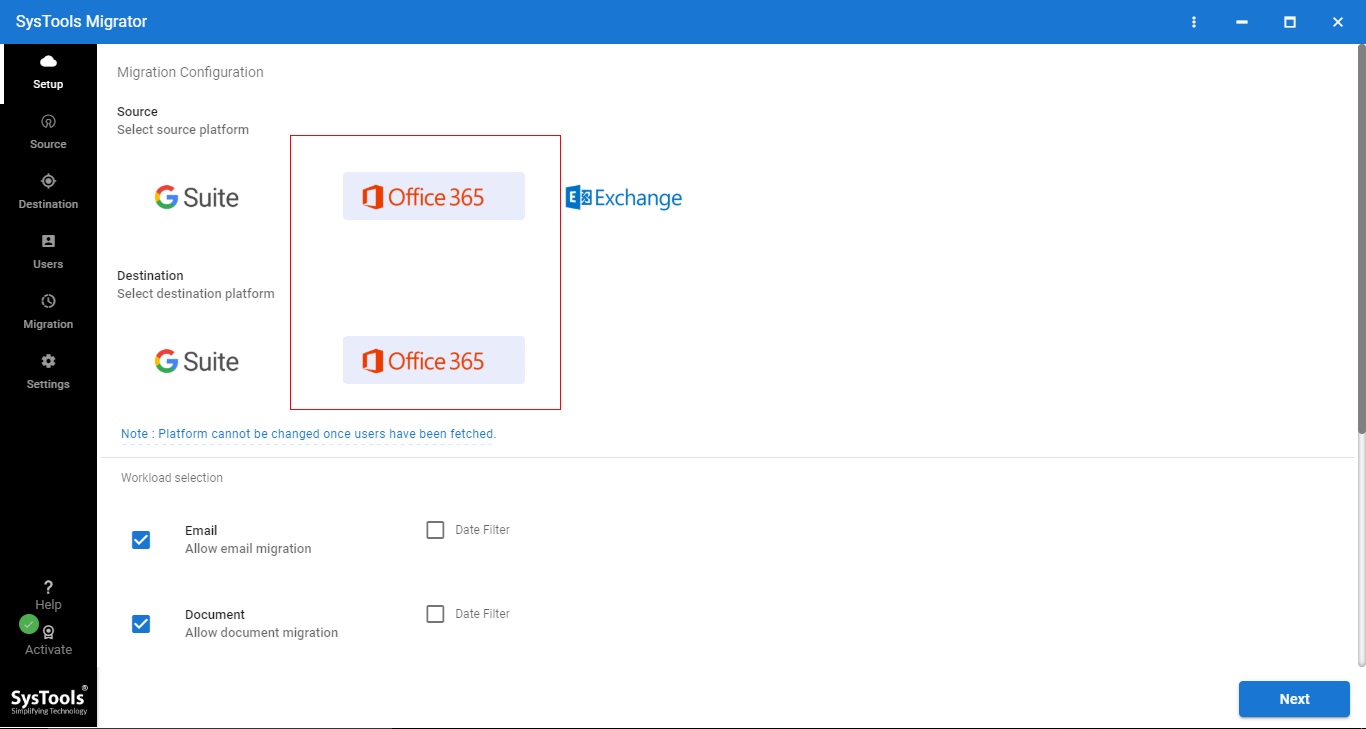
1.2. Select the data that you want to migrate from Office 365 domain to another tenant.
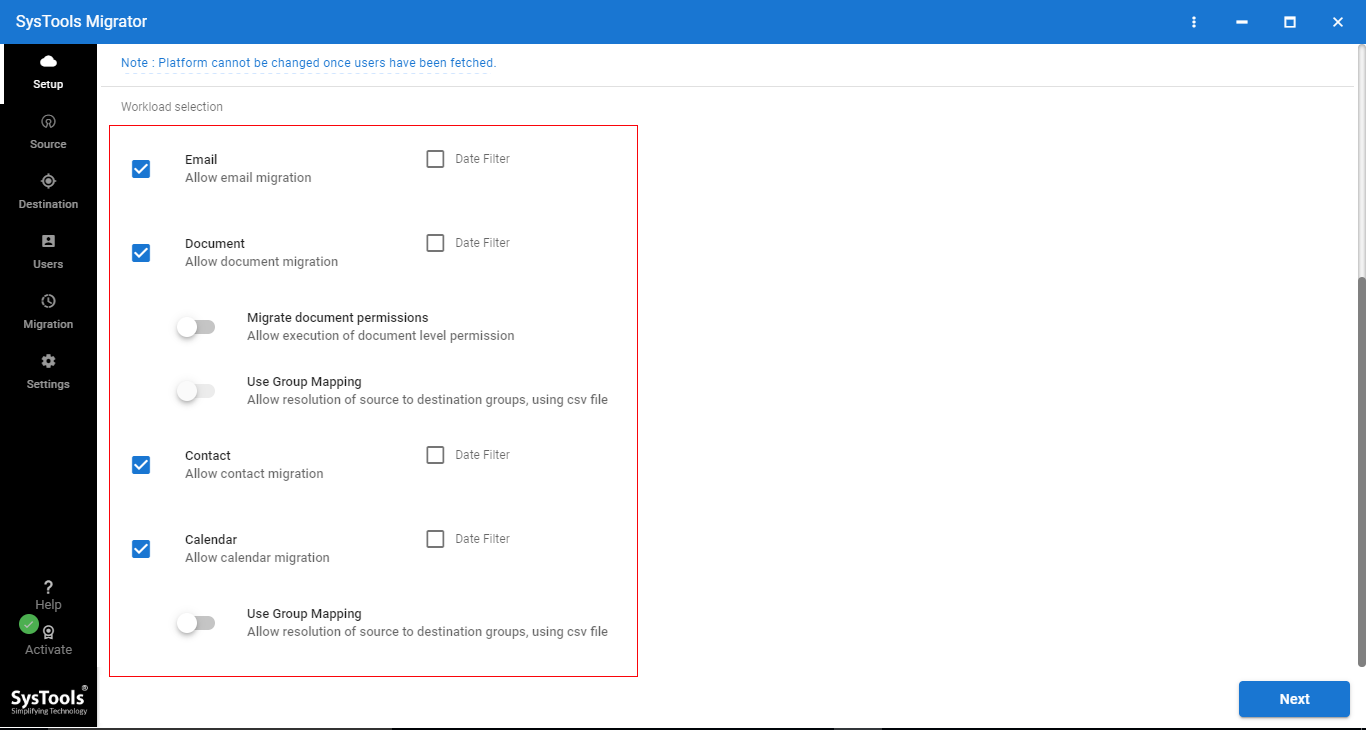
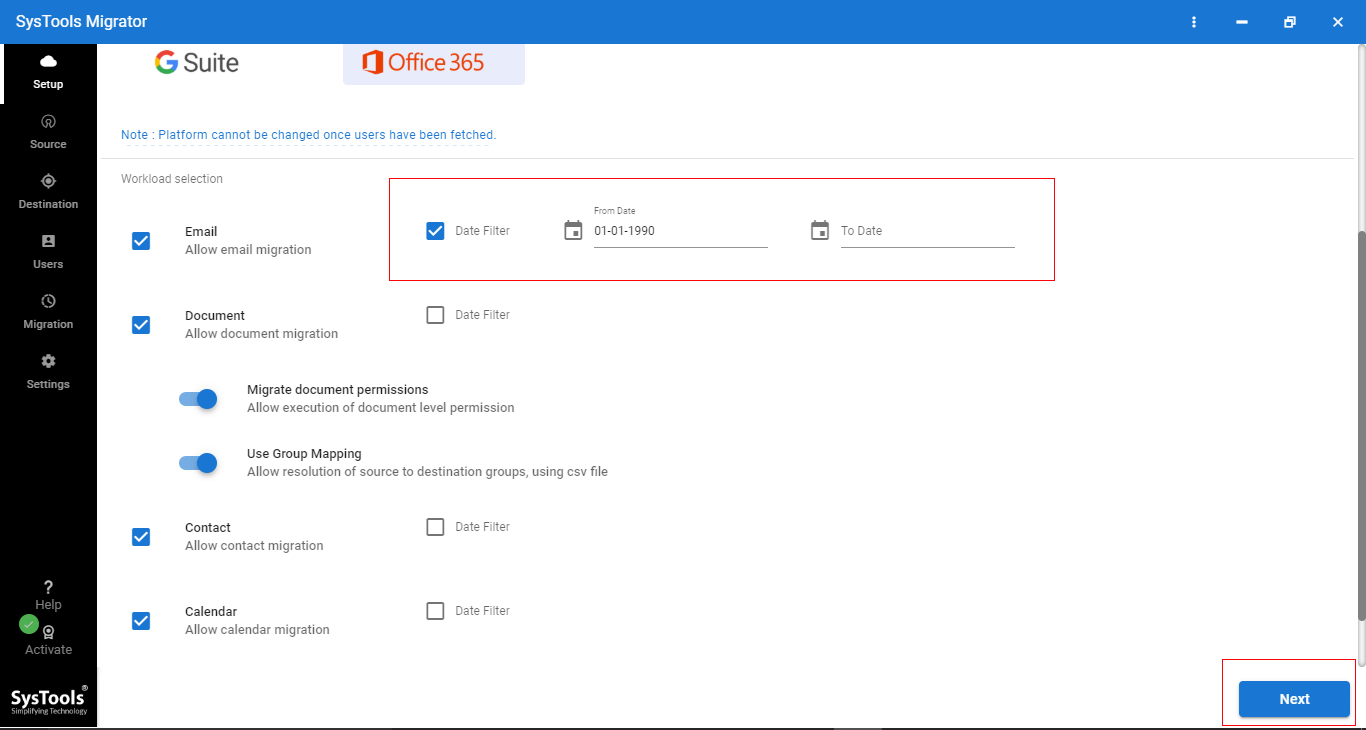
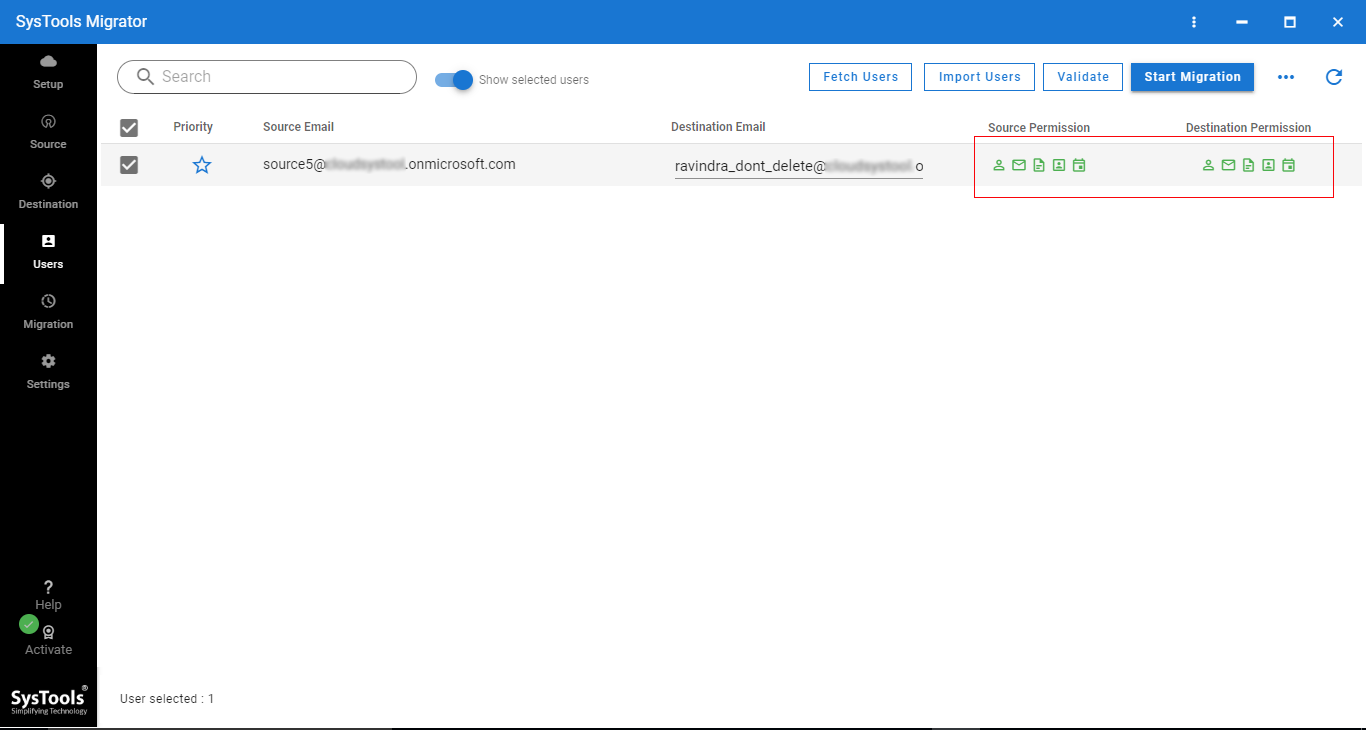
1.3. You can Enable Migrate domain permission and use the group mapping option. The date filter option is also available to move selective data.
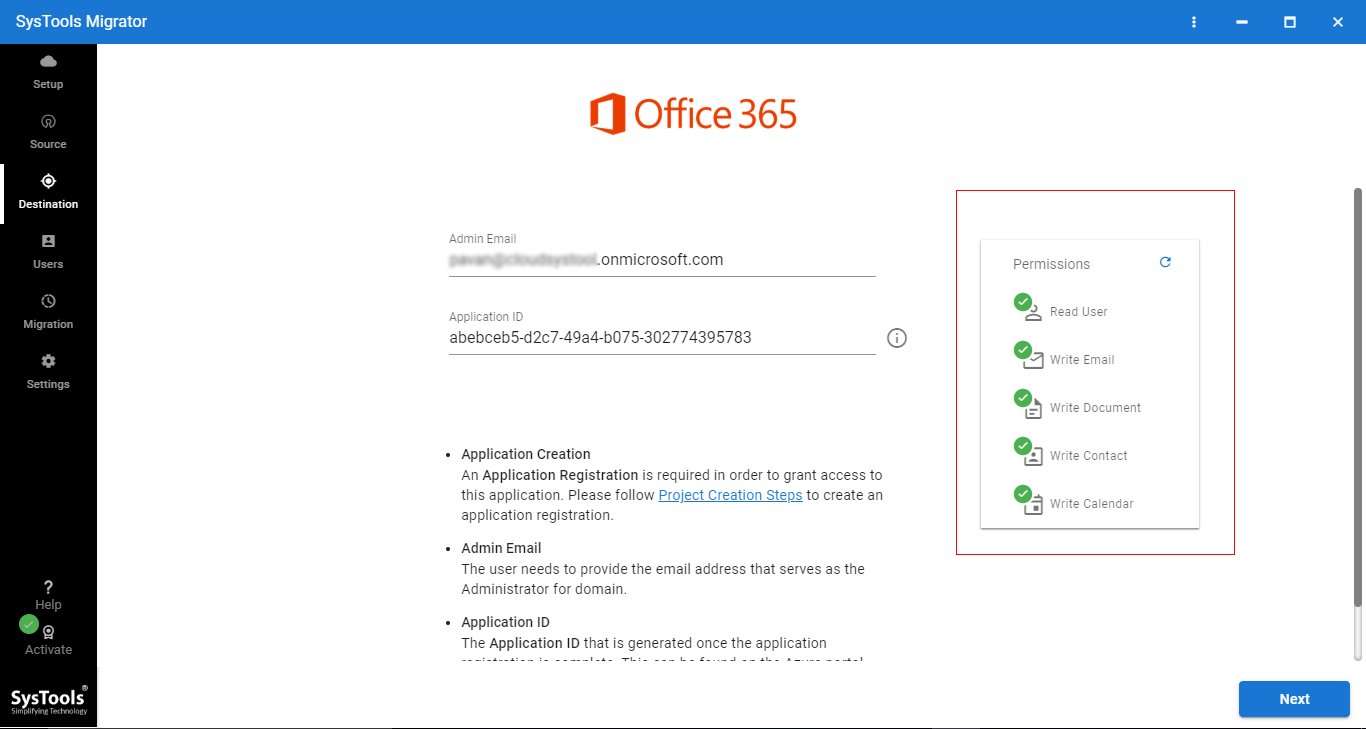
1.4. It’s time to log in to the source Office 365 account. Enter the source Office 365 admin ID & Application ID. Then validate the permission.

1.5. After that, log in to Office 365 destination and validate the permissions.
1.6. Now, you have to download a template in which you will maintain the source Office 365 domain users’ ID and destination users’ ID. Then, import this file (CSV file) into the software to create the mapping.
1.7. After adding the CSV file click on the Validate button to validate permission.
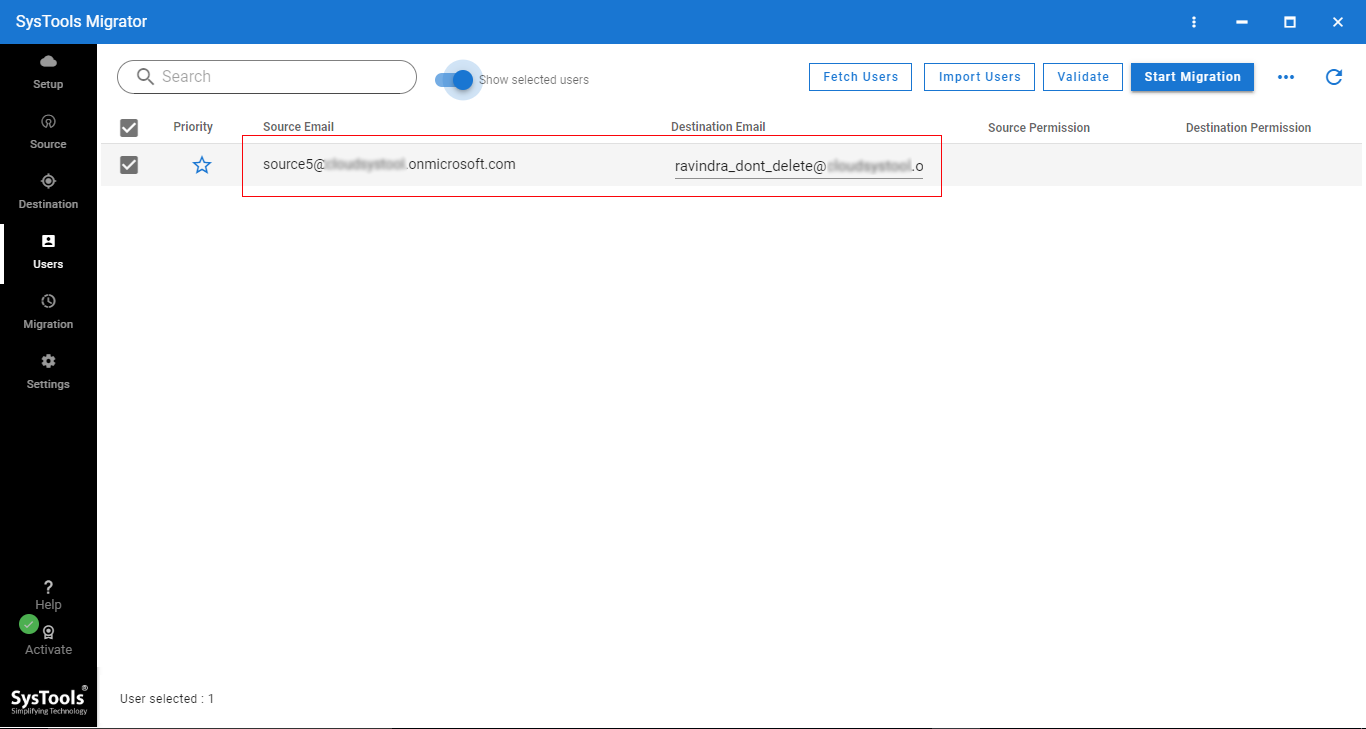
1.8. Now, we are ready to migrate Office 365 domain data to another tenant, click on Start Migration.
Step 2. Detach the Domain from the Old Office 365 Tenant
After migrating Office 365 domain data into another tenant (temporary mailboxes), we are ready to detach the domain from the source tenant. Follow steps:
- 2.1. From the Admin center, go to the Setting >> Domain page.
- 2.2. Select the domain name which you want to detach.
- 2.3. Select Remove from the right pane.
After detaching the domain, you have to follow the next step to attach the domain to another tenant.
Step 3. Attach Domain in New Tenant
Time to attach domain in Office 365 tenant. Follow the given steps to do this task.
- 3.1. Go to the Admin Center. Go to Settings >>Domains Page.
- 3.2. Select Add Domain.
- 3.3. Enter the domain name which you want to add, and click Next.
- 3.4. Now, choose “How you want to verify that you own the domain”
- 3.5. After that, verify the domain.
- 3.6. Choose how you want to make the DNS changes required for Office to use your domain. Here are two options
- 1 – Add the DNS records for me – If you want Office to configure your DNS automatically.
- 2 – I’ll add the DNS records myself – if you choose this option, you have added DNS records yourself.
- 3.7. After that click on Finish to migrate Office 365 Domain to another tenant.
Step 4. Migrate Data from the Same Office 365 Tenant to the Domain
Now in this phase, we have to migrate data (which is previously migrated in new tenant temporary mailbox) from tenant to domain.
But, first, you have to create user mailboxes in Office 365 domain with respect to the old tenant. Then, follow the steps of phase 1 (Migrate Office 365 Domain Data to another Tenant) to migrate data from Office 365 tenant to the newly created domain.
After following all the steps, we successfully migrated the Office 365 domain to another tenant with the user’s data.
Conclusion
In this problem-solving blog, we have explained how can you migrate Office 365 domain to another tenant along with the entire data. To successfully transfer Office 365 domain to another tenant you have to follow each and every step which is explained above.
