How to Migrate Office 365 to Office 365 Step by Step Free Guide


This article talks about the modern solution of the user query i.e. how to migrate Office 365 to Office 365 step by step. As we all know, data migration is quite complicated and cannot be done simply with the help of any manual solution. But, it doesn’t mean we are never going to do it. In this tutorial, we will get to know the entire procedure and will perform this task with just a few simple clicks.
Office 365 to Office 365 Migration Tool will help us to simplify this technically complicated migration without any additional software requirements.
This tool is a powerful solution to perform migration successfully and supports all kinds of necessary data migration. However, the total migration timing and speed depend on your data and its size. The tool offers all the essential features like User Mapping, Groups Mapping, Delta Migration, Multiple Project migration, and Concurrent Migration.
Let’s start the procedure to perform Office 365 to Office 365 migration step by step will help you to simplify this task.
Things to Consider Before Proceeding O365 to O365 Migration Step by Step
Before starting the migration, you must know all the pre-requirements to use this software:
1 – Before performing the migration, you have to create a project in Microsoft Azure. Then, grant the permission and generate the Application ID. Follow the steps below to create a project:
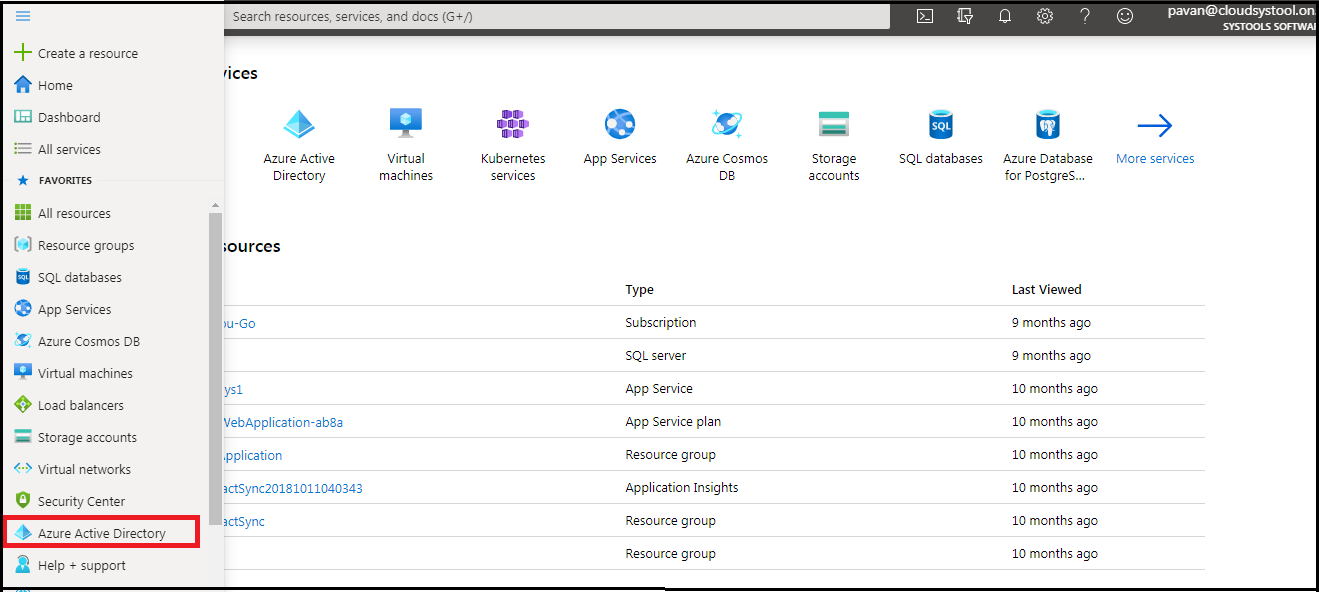
1.1 – Log in to Microsoft Azure Portal with Admin Account. Click on Azure Active Directory >> App registrations >> New Registration.
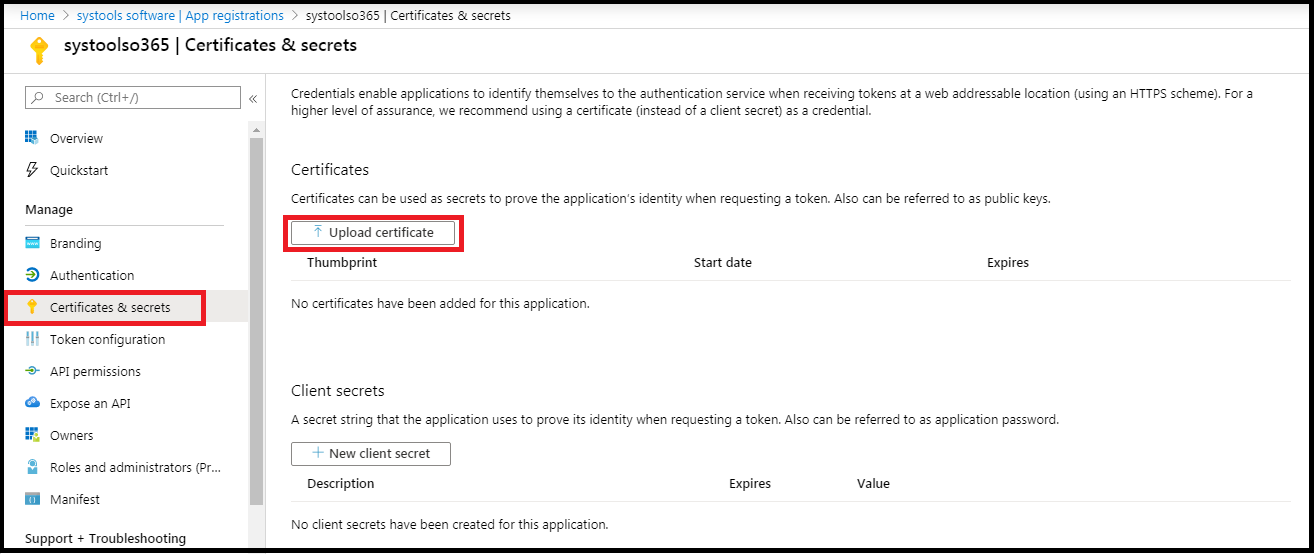
1.2 – Now, enter all the required information and click on Register. After that, click on Certificates & secrets then Upload certificates. Browse the certificates which are provided by (you can find a certificate here – C:\ProgramData\SysTools Migrator\Workspace\Keys\)
1.3 – Now, click on API permission and then +Add Permission.
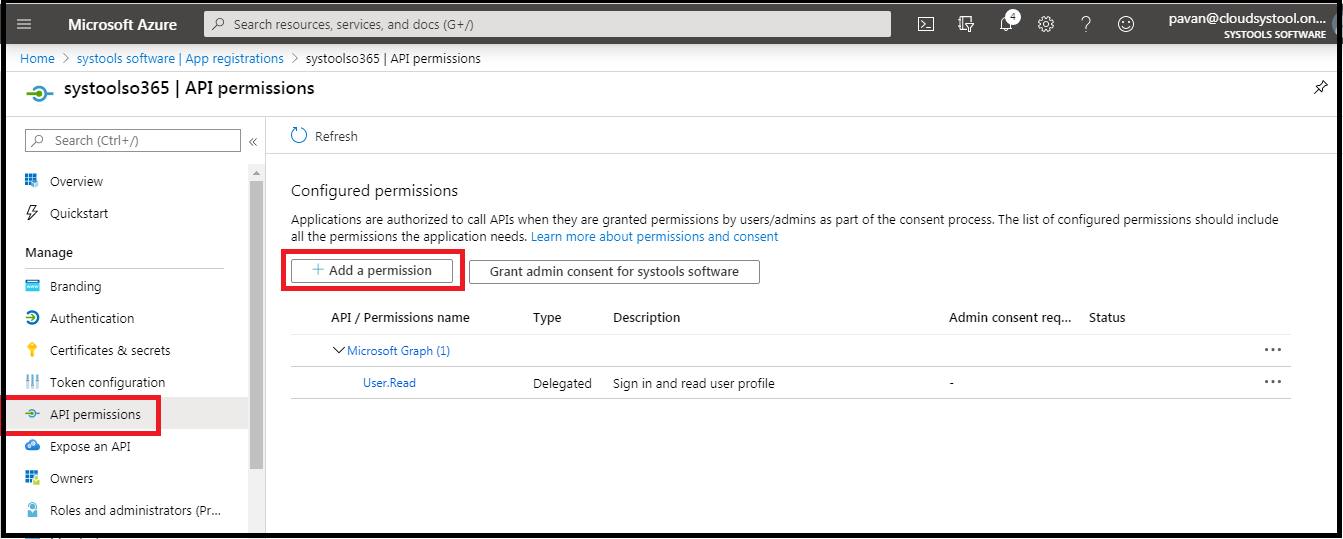
1.4 – After this, select the Application Permission and Add permissions. Click on Grant admin consent.

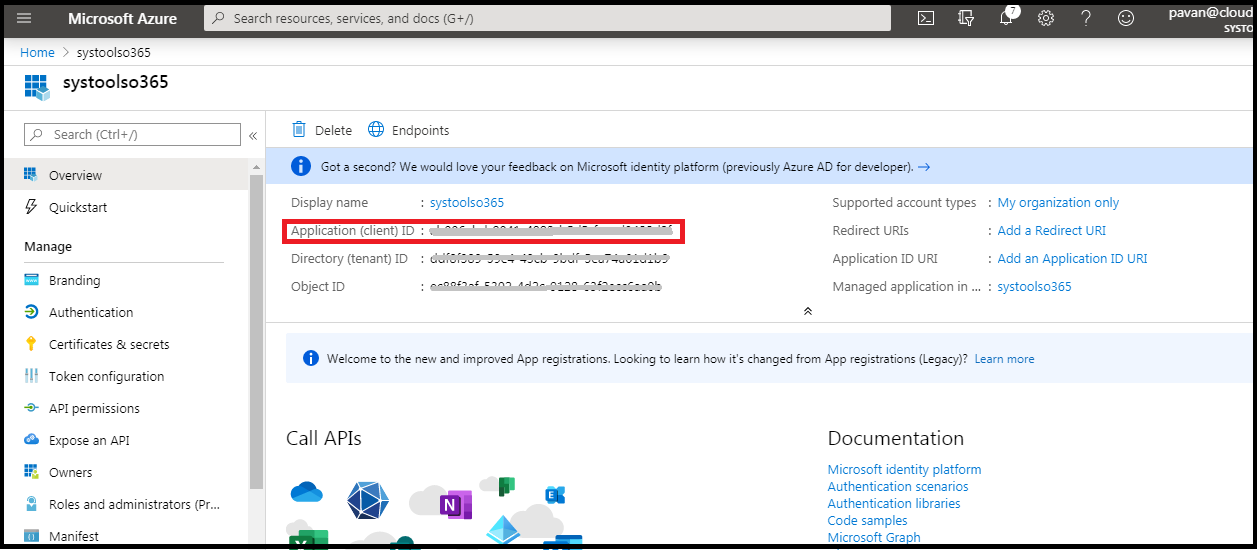
1.5 – Click on Overview to get Application (Client) ID.
2 – Impersonation Privilege:
Before starting the migration with this tool, you have to assign impersonation from Office 365 Exchange Admin Center. In the Impersonation process, we will impersonate a user account. It allows an account to access the entire mailboxes concurrently so that we can migrate Office 365 to Office 365 step by step concurrently.
This tool supports impersonation, which means you can perform the entire user’s mailbox migration by logging in with the Impersonate account. Follow the steps below:
Tip – Assign Impersonation to Admin account
2.1 – Login with Admin account in Office 365, go to the Exchange admin center, and click on Permissions, and Admin Role. Click on the + icon to create a new role group.
2.2 – Enter a name for your role group and assign the role of ApplicationImpersonation. Add members of this role group, click on Save.
3 – Prepare Source & Destination Mailbox for Migration:
You have to prepare source & destination email accounts before starting the migration. You have to know which source user data will be migrated to which destination. For this, you need to do the mapping between source & destination O365 users.
Migration from Office 365 to Office 365 Step by Step with an Easier Way
From this point, we are going to start the migration. Follow the given step-by-step procedure to perform Office 365 to Office 365 migration.
Download the Software –
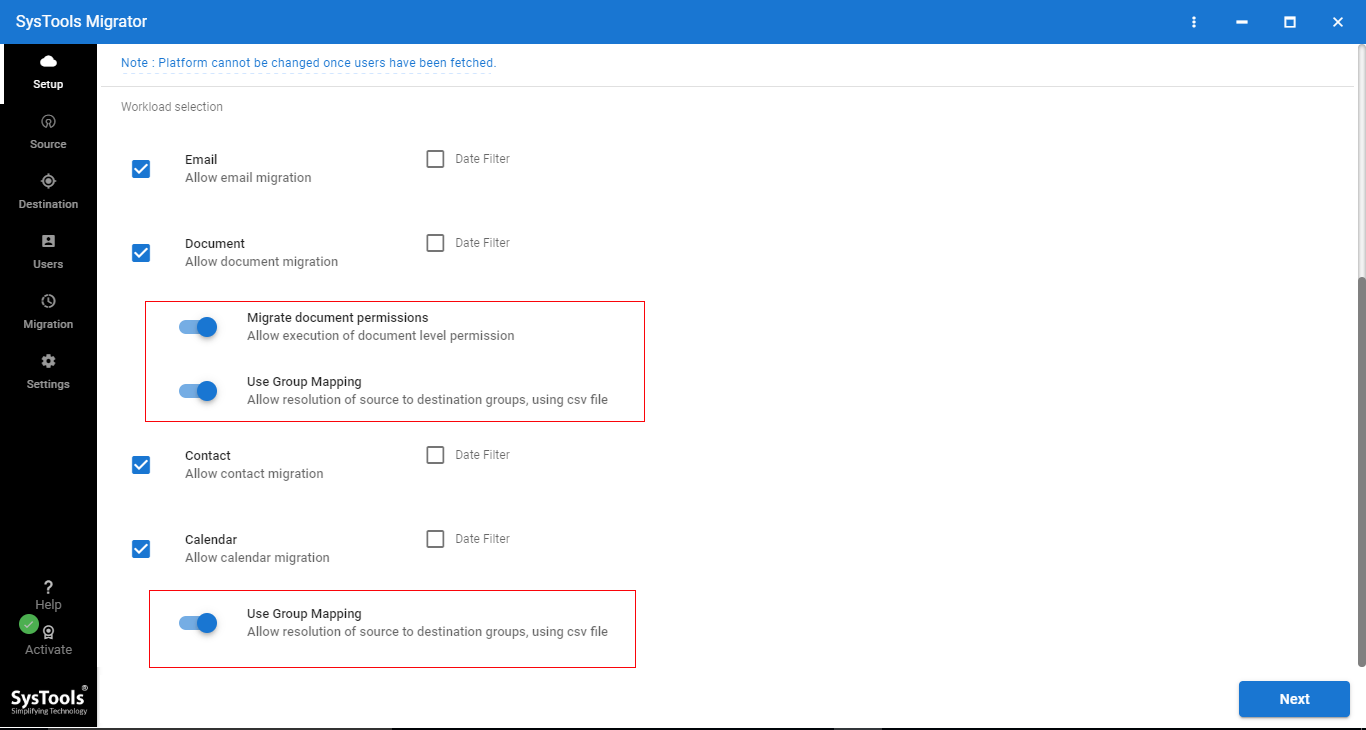
1 – Select Office 365 as source & Office 365 as a destination, click on Next. Select the data that you want to migrate.
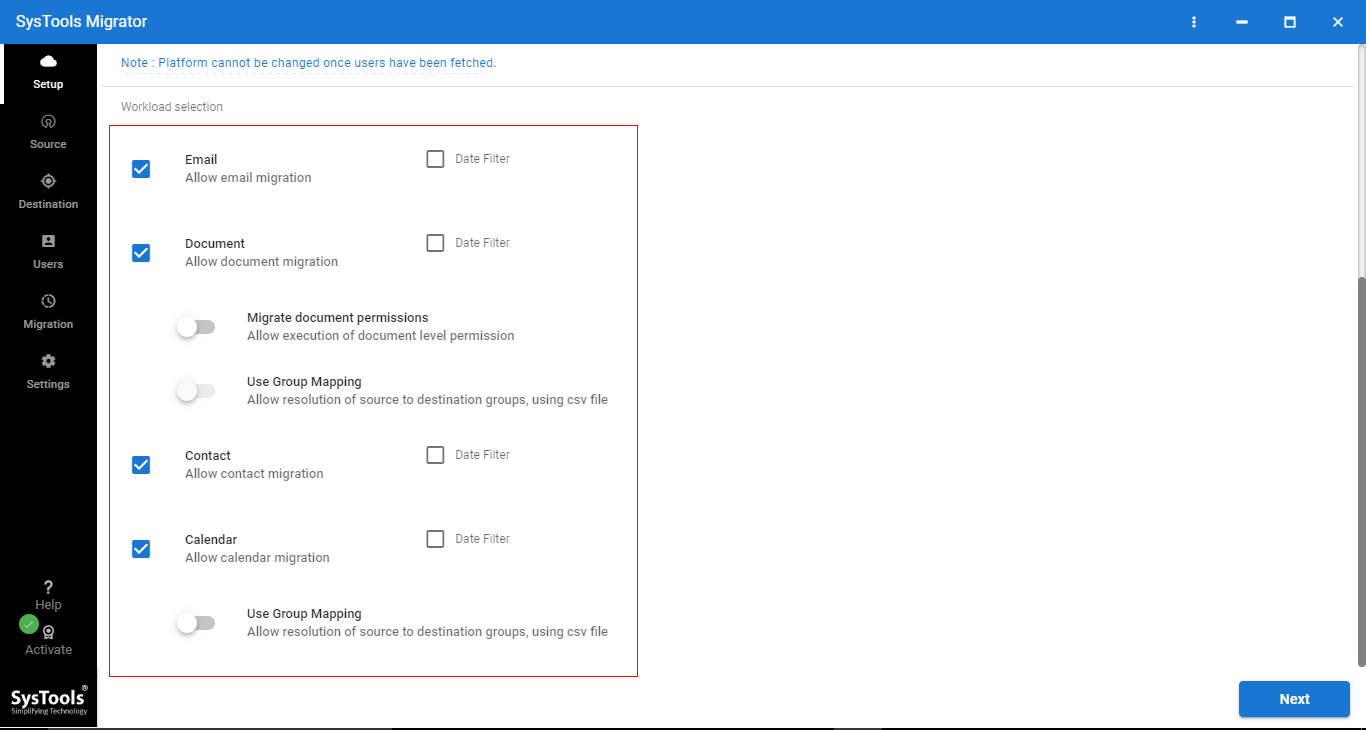
2 – You have to enable the Migrate document permission for Documents and User group Mapping to create a mapping between source & destination accounts.
3 – After this, log in using Source & destination Admin Email and Application ID and then validate. Click Next in order to migrate Office 365 to Office 365 step by step.

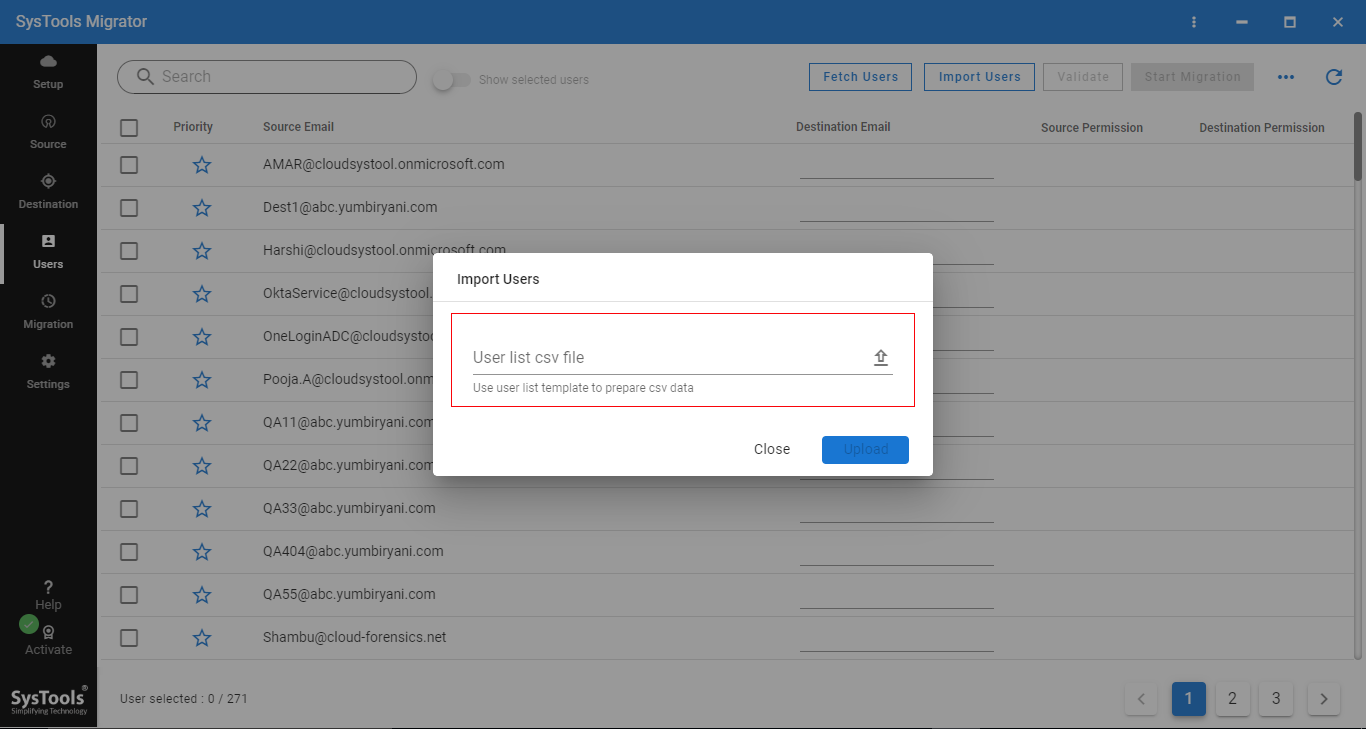
4 – Now, import a CSV file to create a mapping between Source & destination Office 365 users.
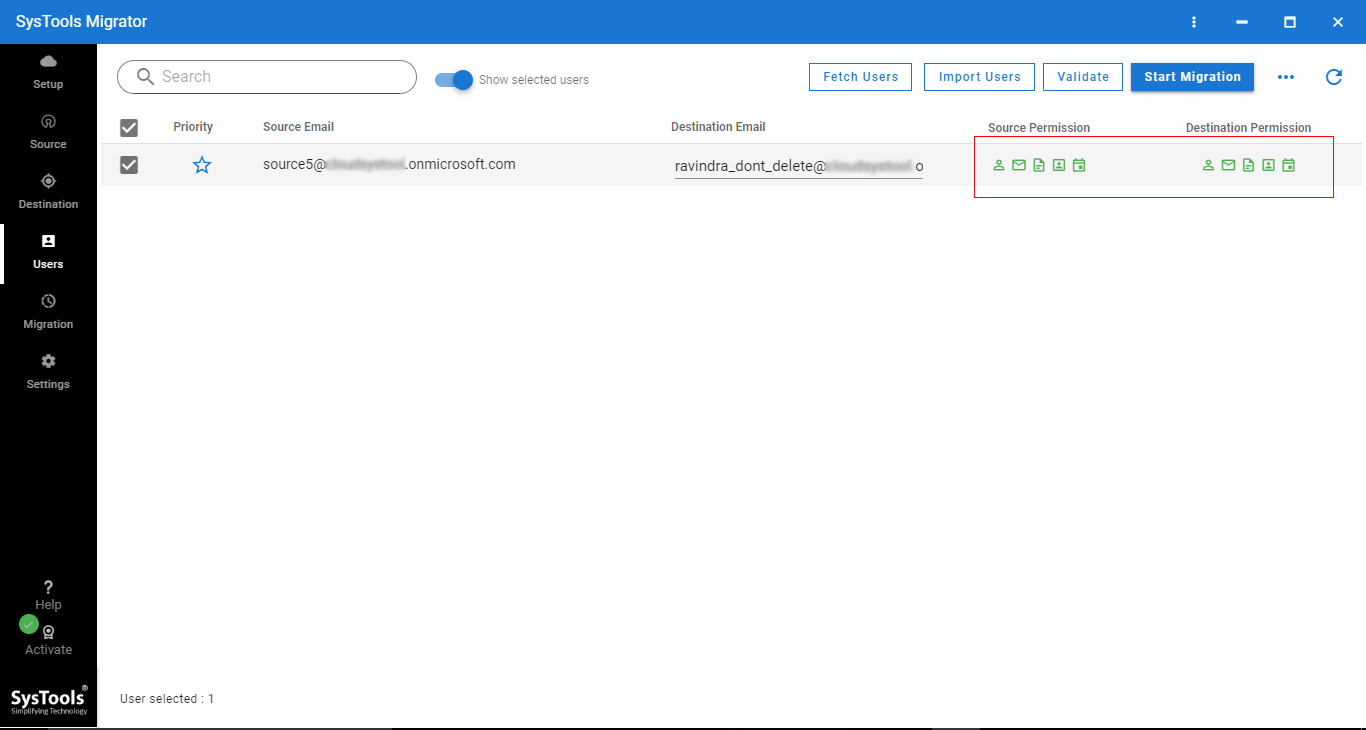
5 – Validate permission and click on Start Migration to initiate the migration process.
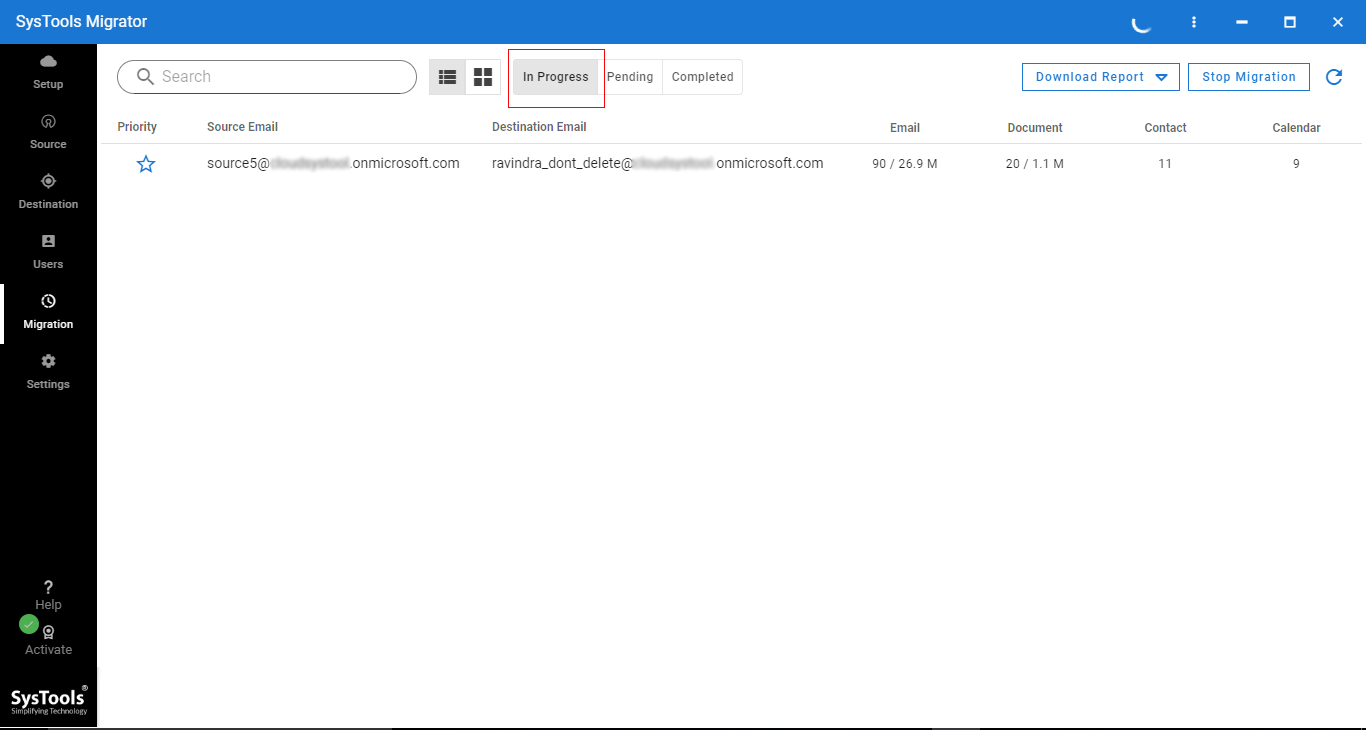
6 – This will start migrating from Office 365 to Office 365 shortly and depending upon your data it will complete the whole process in the minimum time possible.
Why Choose This Tool to Migrate Office 365 to Office 365 Step By Step?
This tool simplifies the complex migration task and with the help of this tool, you can easily migrate emails, contacts, calendars, and documents from one Office 365 to another Office 365 mailbox. It allows user group mapping between O365 source & destination.
Moreover, it supports the user data migration between Office 365 domain, date-based filter for selective data migration, and supports priority account-based migration.
Apart from this, it provides 3-options for Re-Run Migration – Retry Failed Items, Re-Run Full Migration, and Delta Migration. This migration with this tool is 100% secure and it helps to perform point-to-point migration.
High-Performance migration is another benefit of this tool. The software uses all the required resources to increase the speed of migration.
Conclusion
This step-by-step guide talks about a migration from Office 365 to Office 365. The solution described here is a simple, efficient, and direct solution. All the users, whether tech-savvy or not can perform this complex task from now on and will face no difficulty while performing the migration task.
