Complete Guide to Export Office 365 Calendar to Excel


In this article, we will explain the step-by-step procedure to export Office 365 calendar to Excel. Here is the complete solution for all Microsoft Outlook users which is easy and simple to use.
Table of Contents:
Note: There is no direct option to export the Office 365 calendar to Excel in Office 365 account. So, in this write-up, we prefer the easiest and most reliable way of exporting the Office 365 calendar to Excel on Mac.
Method of Exporting Office 365 Calendar to Excel
As we know there is no other option to export the Office 365 calendar to Excel CSV file. Don’t Worry! Here is the solution to your problem. You can use our Office 365 export tool to export your Office 365 calendar to Excel.
Steps to Export Office 365 Calendar to Excel through eDiscovery
- Open the Office 365 Admin Center by entering reliable credentials for logging in to your Office 365 admin portal
- Navigate the Exchange Admin Center option
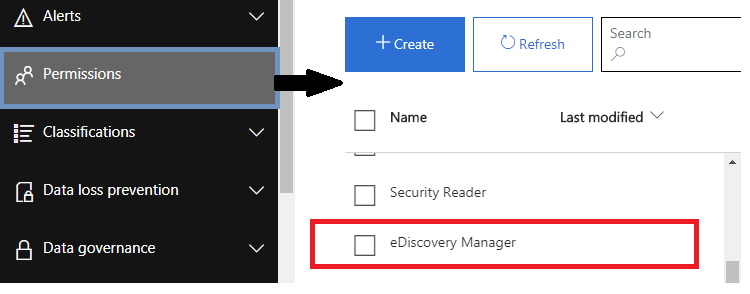
- Click on the Edit option to add the crucial role for this Discovery Management
- Make sure that Mailbox Import-Export, Legal Hold, and Mailbox Search roles are added by default. If it is not added just hit the ‘Add role’ button
- Add your account in the window in the member’s list and click on the OK button
- Again come to the Exchange Admin center select Compliance Management and click ‘NEW’ to launch the ‘In-place eDiscovery & Hold wizard’, Enter a name and click ‘Next’
- Then, choose the mailboxes for operating the search function. Select the desired mailboxes from the list
- There is an option if you want to export your Public content or to search for content that is in your ‘Public Folders’
- You can see some filter options to filter mail in the mail-box
- Click Finish to save your process
- The search setting display will appear after saving the settings and Now, you can proceed to the further steps
- Search status will also be visual to you after completion of the process
- Now you can convert the result of your Office 365 calendar to Excel
Note: You should have to use the latest version to run this application
Expert Method to Export Office 365 Calendar to Excel
Using this method users can easily export Office 365 calendar to Excel. You need to follow the steps given below to export your Office 365 calendar to Excel.
You need to follow the process in two phases. so let’s get started with phase one.
Phase 1- First Export Microsoft Office 365 Calendar into Outlook PST
- Step 1- Download and launch the Office Export Tool on your Windows OS.
- Step 2- First provide the source as Office 365 and the Destination as Outlook.

- Step 3- Select a category from the workload selection bar and apply date range filter options.

- Step 4- Now provide the details like email ID and application ID of Office 365 and validate the required permissions.

- Step 5- Next, add a backup folder path and validate certain permissions to the software.

- Step 6- Now, multiple ways exist to add users from the source account i.e. import users, fetch users, and download template.

- Step 7- Next, you’ll find the Show Selected toggle, which shows the list of users you’ve chosen. You can also look for a particular mailbox and select the user to export.

- Step 8- Finally, click on Start Export to export Office 365 emails.

Now, let’s move forward toward the 2nd phase.
Phase 2- Converting PST Files to Export Into Excel
For this type of conversion, you need to have here a professional solution PCVITA PST Converter Software.
You can simply use this tool to convert PST to CSV file format without any data loss. This software can easily export your entire data from Outlook mailbox and save it locally.
Follow the steps Mentioned Below to know the working of the software:
- Step 1- First download and install the software and click on add files which you want to convert.

- Step 2- Now, select the file or search the file as per your requirements and click add.

- Step 3- Here you can export specific emails or the complete mailbox

- Step 4- Now select the CSV export option and tap on export

- Step 5- Now browse and choose the destination.

- Step 6- Lastly, select the necessary checkboxes to proceed with the export process.

After performing all the steps what you finally need to do is :
- Simply just open the CSV file saved on your system.
- Tap on the save option in the top left corner.
- there you will see the option of saving a CSV file in Excel format.
Features of Office 365 Export tool
- Download Office 365 emails, and contacts into 4+ file formats
- Offers Pause and Resume of an ongoing process
- Provide Exclude Deleted / Sent Items folder option which exports data
- Additionally, provide naming convention feature assistance while managing bulk data
- Support all the latest version of Mac OS 10.15 & below versions
Final words
As we already know there is no official way to export the Office 365 calendar to Excel. We will provide you with the step-by-step process to export Office 35 calendar to Excel. This tool can export all your Office 365 calendars, contacts, and emails into a CSV file format. Even a non-technical guy can export Mac Office 365 calendars in a trouble-free manner.
