How Do I Transfer Office 365 License to New Computer ?


Problem Statement
User buys a new computer system or laptop for their convenience and wants to transfer Office 365 License to New Computer. They now want to transfer their Office 365 of old computer into new computer. Even if user is having license then also they will be fail to login into Office 365 accounts from new computer because it will generate an error messages.
Solution to Transfer Microsoft Office 365 License to New Computer
No need to take stress for such problem, following procedure describes how to transfer Office 365 license to new computer, which will help you in resolving the problem at hand:
NOTE: Troubleshoot of the problem is to first uninstall Office 365 from old computer and then re-installing it in new computer.
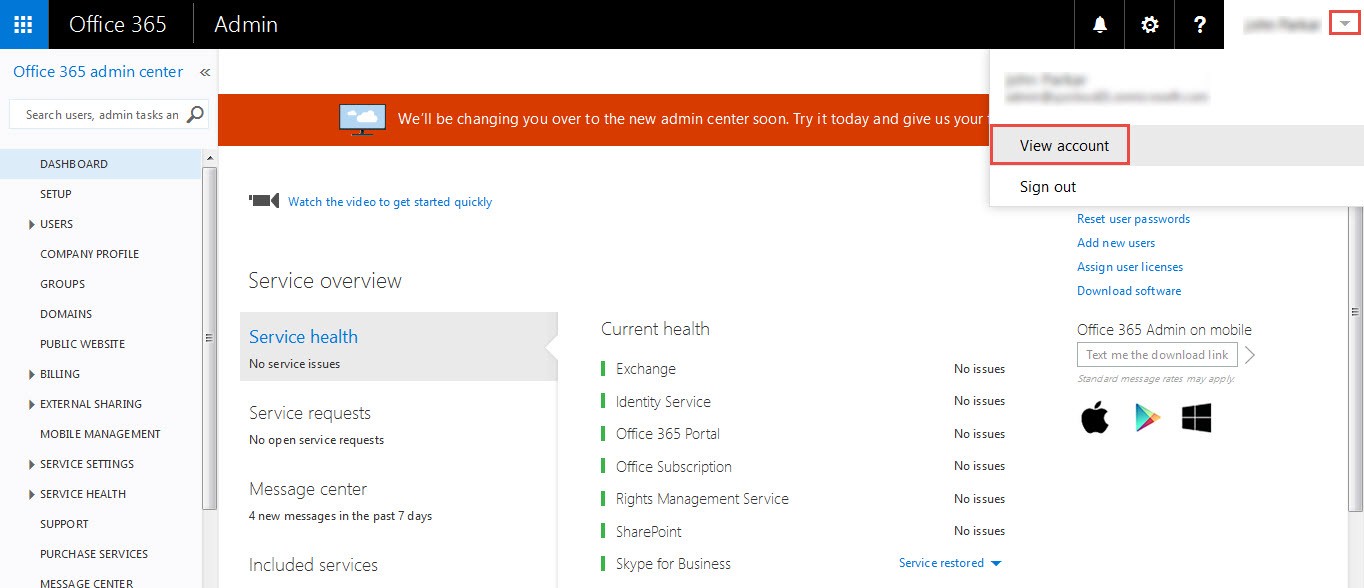
- Enter Email/Phone and Password on https://login.microsoftonline.com to login into your Office 365 account.
- At the very right hand side, click on drag button and select View Account.
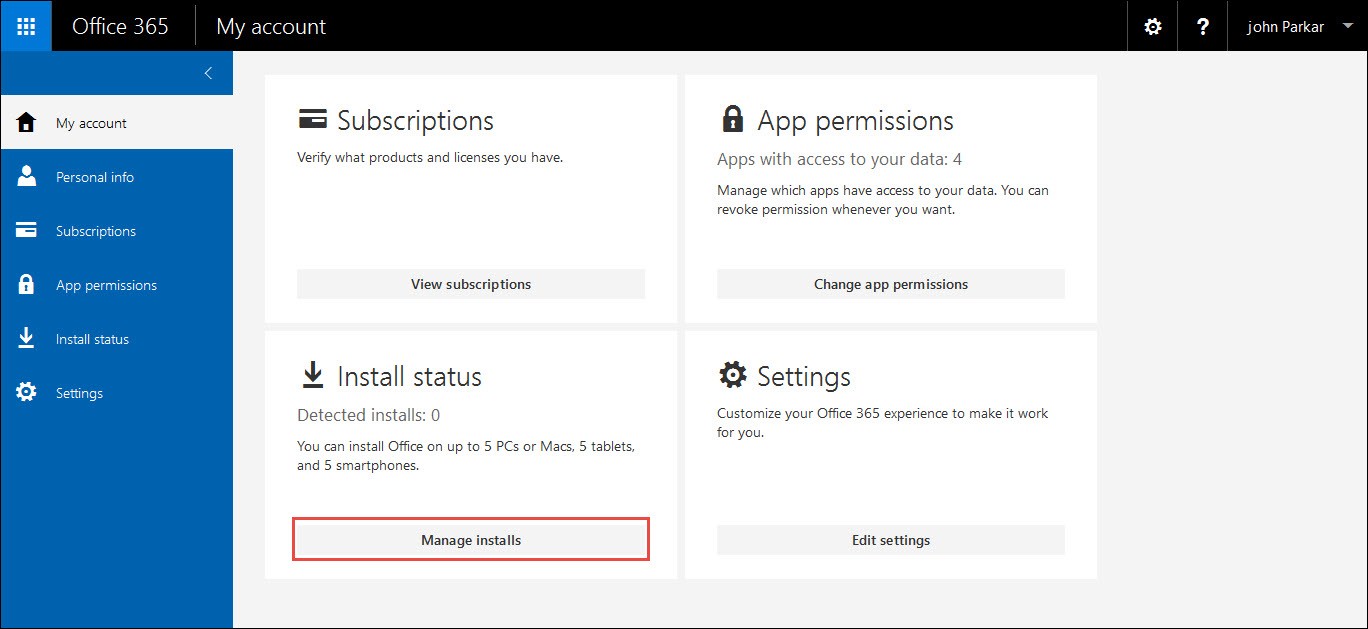
- After doing so you will come across a My account page. Select Manage Installs option from that page.
- The Install Status subpage will be displayed in which search the computer name (old computer) and in that click on Deactivate Install option.
- Are you sure you want to deactivate this install – Warning box will display. Click on Deactivate to continue.
- Now go to Start >> Control Panel >> Uninstall a program.
- Search for Microsoft Office 365 – en –us in control panel and then Click on it & Uninstall.
- A confirmation message will display. Click on Uninstall button to continue.
- Now in your new computer (where you want to migrate Office 365), Login into Office 365 by entering your credentials.
- At the very right hand side, click on drag button and select View Account.
- After doing so you will find a My account page. Select Manage Installs option from it.
- Click on Install option which will download the setup of Office 365 on your new computer.
- After the setup is downloaded, Go to location where it is setup is downloaded and Double Click on it.
- For continuing the procedure, click on Run option.
- Now a welcome page of Office will appear, Click on Next >> Next
- If you want to sign in along with installation process then click on Sign in and for signing later click on No thanks, maybe later. Here we have consider No thanks, maybe later.
- After that click on Next.
- A confirmation page notifying you that thing is getting ready. If you want to review the things then click on Take a look else click on No, thanks.
- Now the installation procedure will take place in background and you can use the program. Remember do not go offline or restart the computer until the background procedure is not completed.
Conclusion
By applying the above-mentioned workaround, you will easily be able to transfer Office 365 license to new computer without coming across any complications. Meanwhile, the procedure is easier to implement too, which makes it even more user friendly.
