How to Connect Hostinger Email to Gmail via IMAP & POP


Are you tired of switching between Hostinger and Gmail to manage the accounts? Then you can choose to connect Hostinger email to Gmail using IMAP and POP. Use built-in options given in Gmail settings to complete this task.
Follow our step-by-step guide to add Hostinger account to Gmail and manage all the emails of both accounts in one location. Choose the method that works best for you.
We even provide you with a tool to migrate Hostinger emails to Gmail (G Suite/Google Workspace) without any problems.
Table of Contents:
Reasons to Connect Hostinger Email to Gmail
Managing multiple email accounts in one place is a convenient option to have. It directly increases the efficiency of your email management and adds to your productivity. By connecting Hostinger email to Gmail, you can have all the emails in one place. This saves you time in switching between the accounts.
In addition, Gmail provides you with a number of features that are not available in Hostinger such as schedule emails, templates, better spam filters, tools integration, etc.
So not only it helps in your workflow but also adds more functionality to your email.
Note: We are assuming that you already have a Hostinger email account ready to be connected to Gmail.
2 Ways to Add Hostinger Email Account to Gmail
There are two ways to connect Hostinger email to Gmail:
- Send mail as another user via IMAP
- Check mail from another account via POP.
How to Connect Hostinger Account in Gmail via IMAP
This method adds the Hostinger account to the Gmail account using IMAP. IMAP syncs both email accounts together. It will allow you to send emails from Hostinger email address using the Gmail interface.
- In Gmail, go to the Settings menu by clicking on the gear icon in the upper right corner.
- Select “Settings” from the dropdown menu.
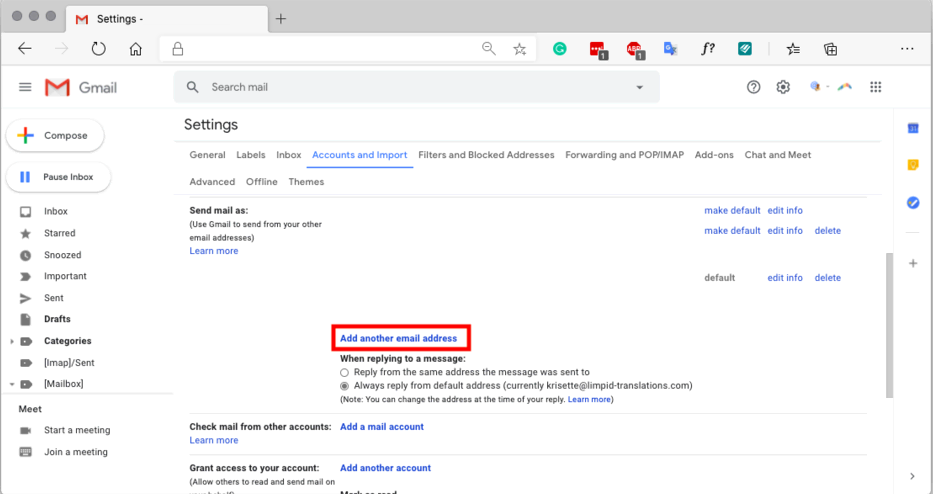
- Navigate to the “Accounts and Import” tab.
- Under the “Send mail as” section, click on “Add another email address“.
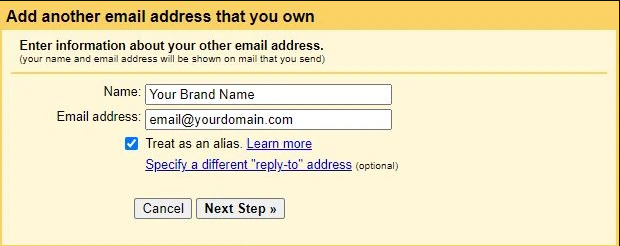
- A new window will pop up. Enter your Hostinger email address and click “Next“.
- Choose “Send through Hostinger’s servers” and click “Next“.
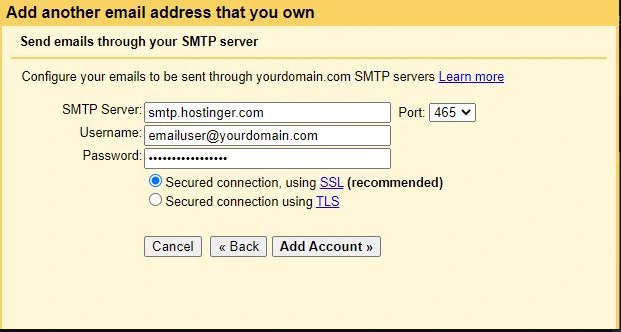
- Enter the Hostinger email server information (SMTP server, username, and password).
- Click “Add Account” to complete the process.
Configuring these settings allows you to send emails from your Hostinger email address directly through Gmail, giving you a unified email experience.
How to Add Hostinger Email to Gmail via POP
With this, you can either import emails from your Hostinger account to your Gmail inbox or link the two accounts using Gmailify. With Gmailify, you get to keep both email addresses but manage emails from both within the Gmail inbox. We will connect Hostinger email account to Gmail using POP protocol.
To add your Hostinger email account to Gmail, follow these steps:
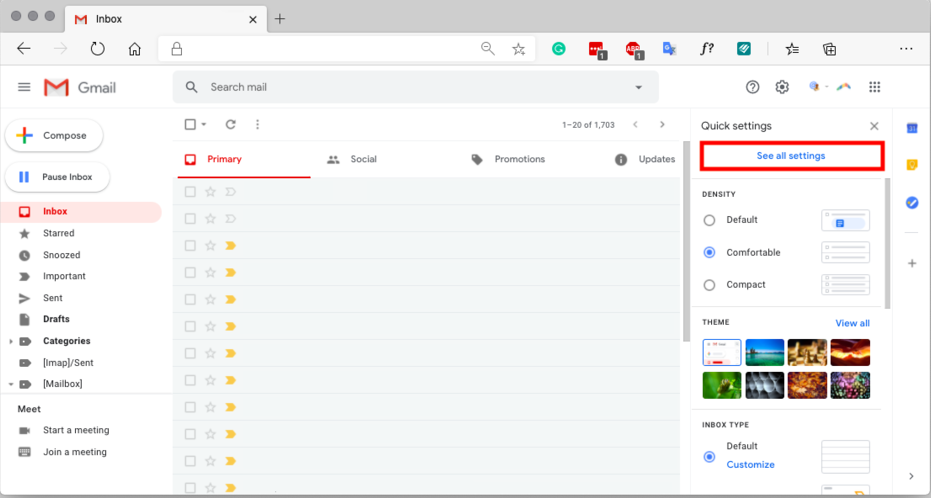
- Open Gmail and click on the Gear icon in the upper right corner.
- Select “See all Settings” from the dropdown menu.
- In the Settings menu, click on the “Accounts and Import” tab.
- Under the “Check mail from other accounts” section, click on “Add a mail account“.
- A new window will pop up. Enter your Hostinger email address and click “Next.”
- Choose “Import emails from my other account (POP3)” and click “Next.”
- Enter the Hostinger email server information you noted earlier (incoming and outgoing mail server).
- Choose the desired options for importing emails, such as leaving a copy of retrieved messages on the server or applying a label to incoming messages.
- Click “Add Account” to complete the process.
This method only imports your date from Hostinger to Gmail. To connect the two accounts, you can either use the IMAP method given above or use the ‘Gmailify’ option in this method.
Note: In case your need entails transferring emails from Hostinger to Gmail, you can use the following method. Do note that the method below does not connect the two accounts but allows data migration.
How to Import Hostinger Emails to Gmail [Google Workspace]
G Suite or Google Workspace is a cloud-based productivity that includes Gmail as the email service. This is generally termed business Gmail
You can use the above methods to connect your Hostinger account to business Gmail account. However, in this method, you will import Hostinger emails to Gmail using IMAP to G Suite Migrator tool. So make sure that this is your exact requirement.
This tool also supports IMAP to Office 365 migration.
Pre-requisites of the method:
- Destination User Account should already exist in the G Suite domain
- Whitelist Customer Management domain in network firewall.
- Create Google Console Project, Enable API & Add Scopes.
Here’s how it works:
Step 1. Launch the software on your Windows PC and activate the tool.
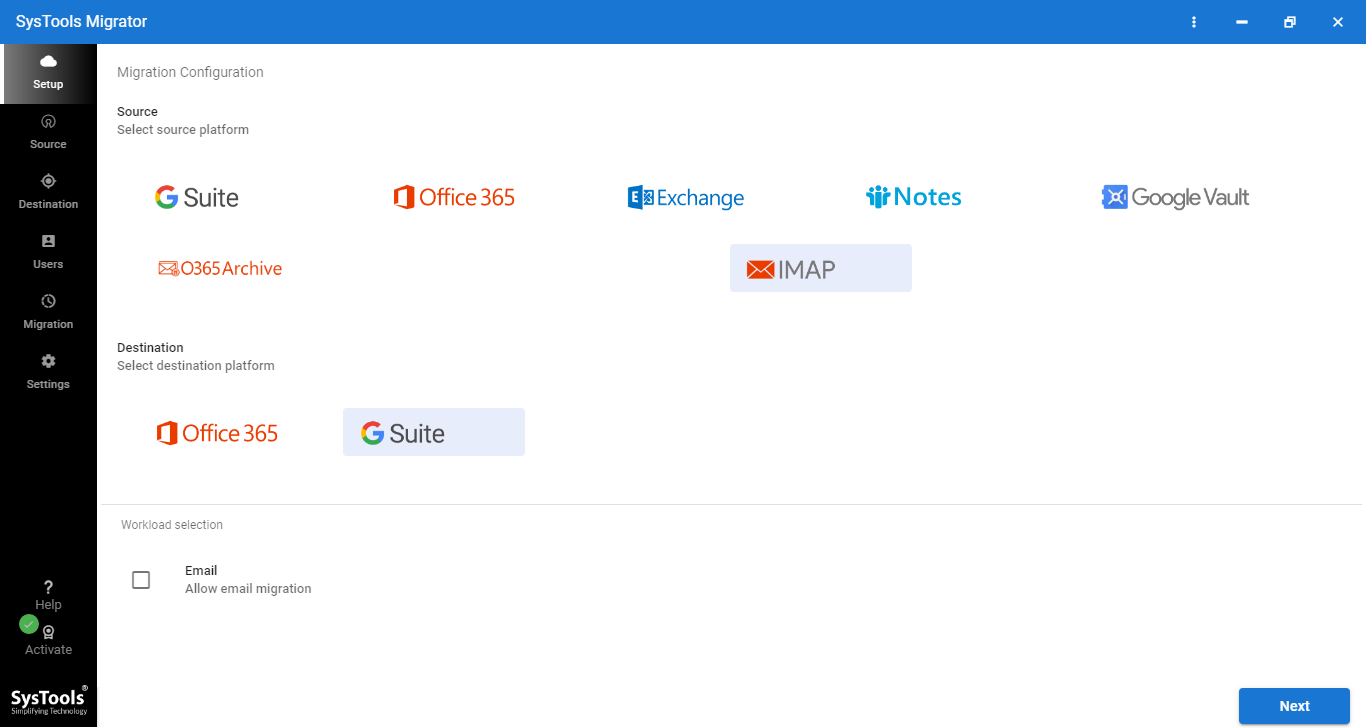
Step 2. Click on the IMAP option in Source and select G Suite in Destination.
Step 3. Once the source and destination are selected, go to the Next window to select Others from the list of IMAP options.
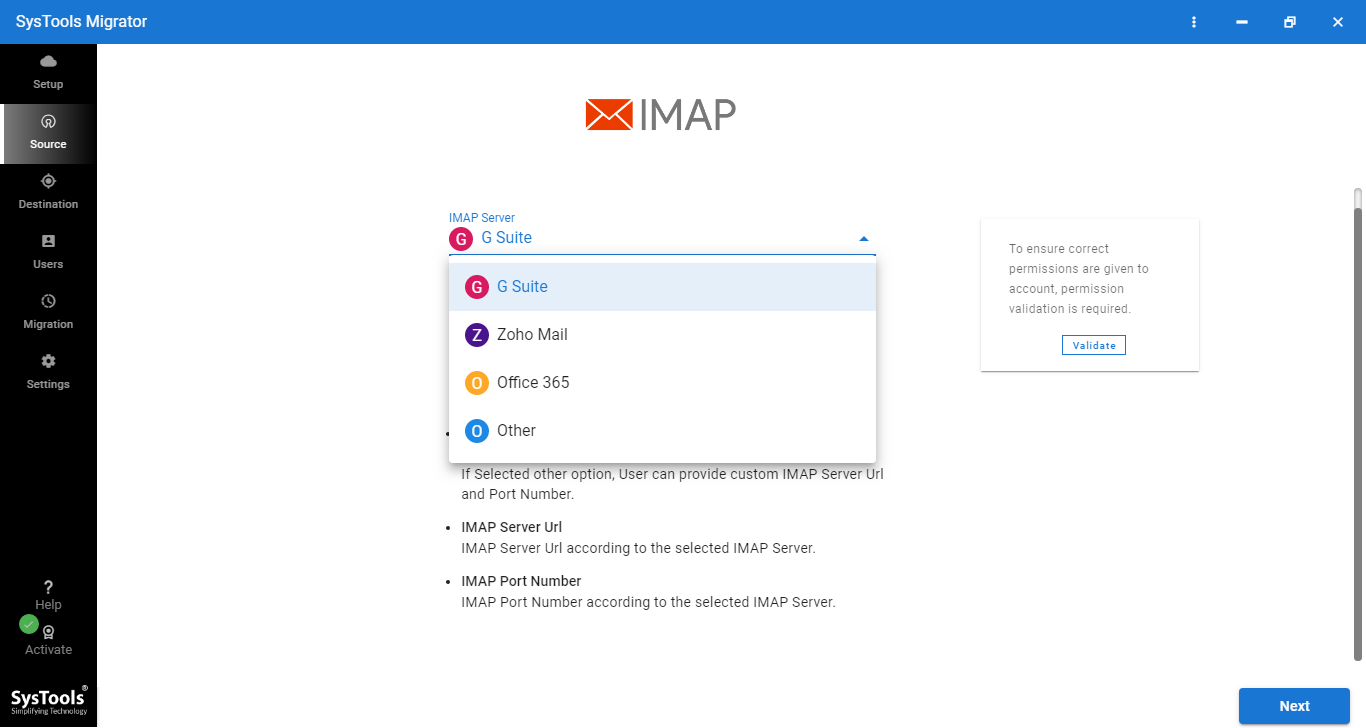
Step 4. Enter “imap.hostinger.com” and “993” in the given text box and validate the permissions.
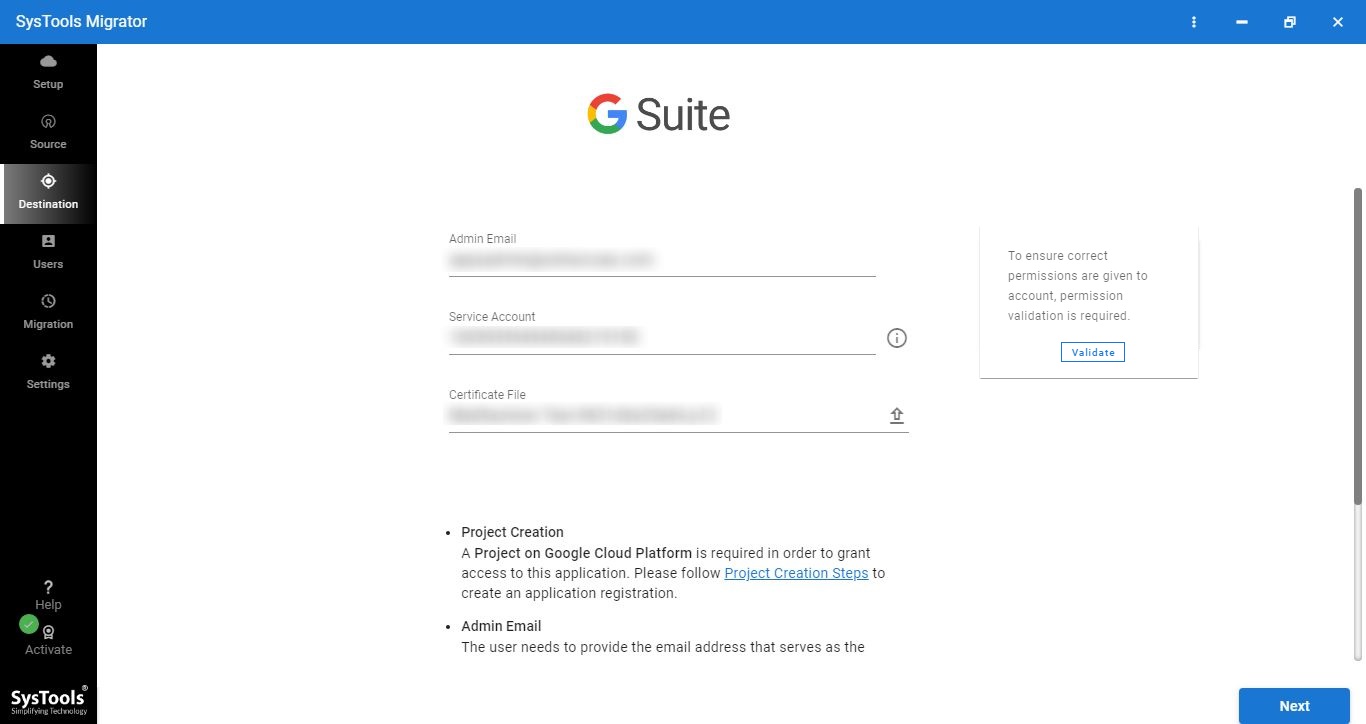
Step 5. Once done, go to the next window to enter the details of your G Suite email account (get the detail from pre-requisites).
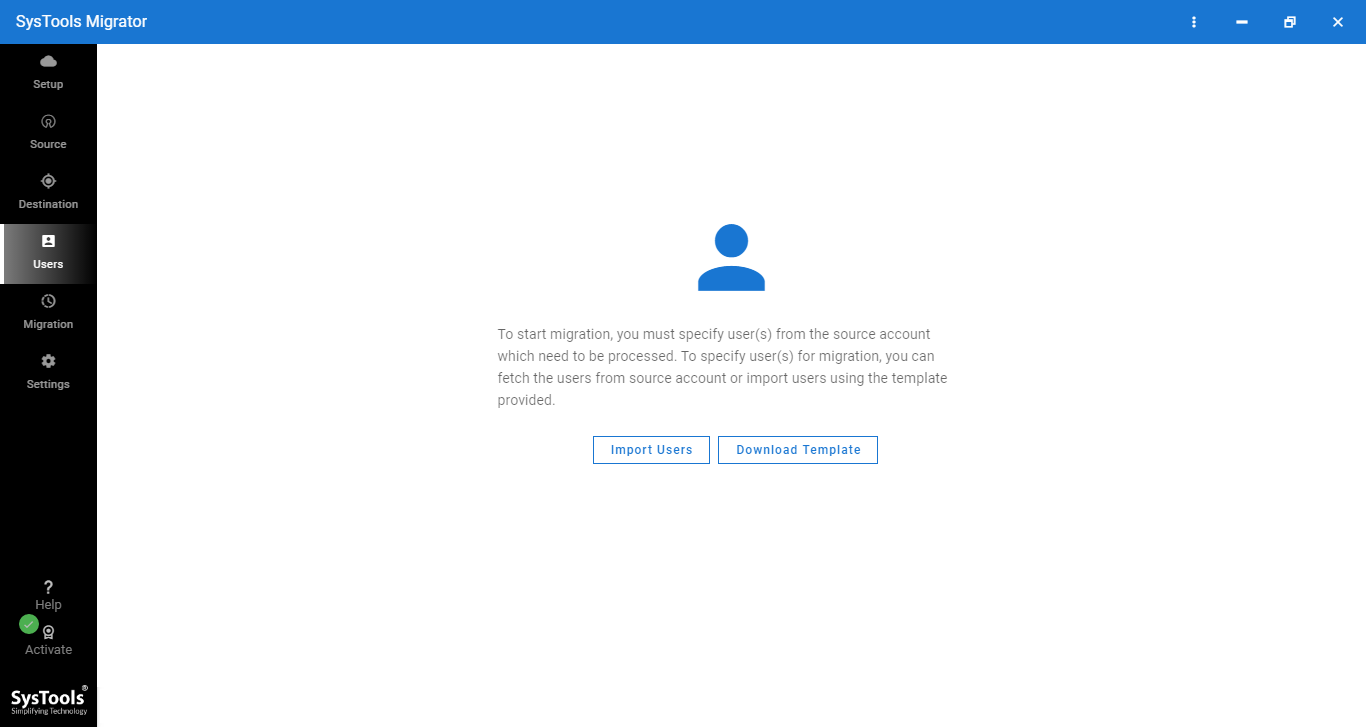
Step 6. Import the user accounts of both Hostinger and Gmail in the software via a CSV file.
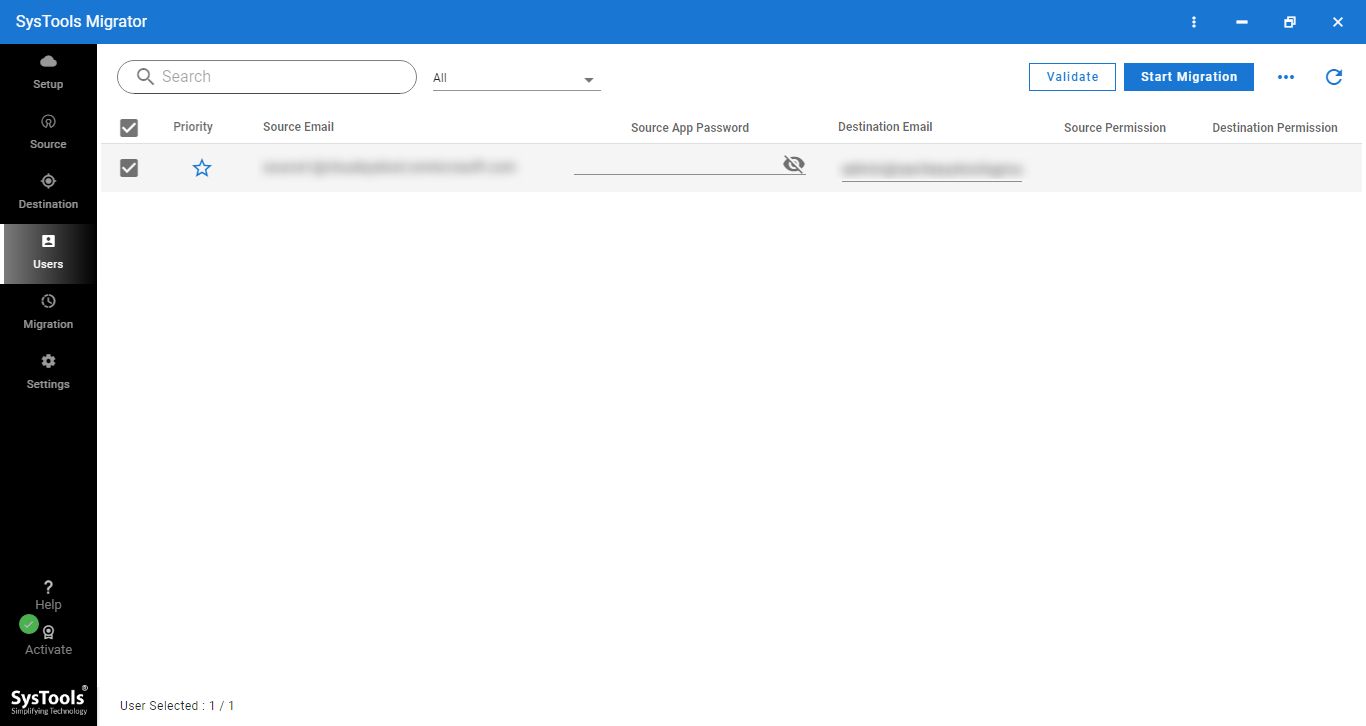
Step 7. In this screen, you need to add the Source App Password for the desired accounts you want to migrate. Then Click on Validate button on the top right side.
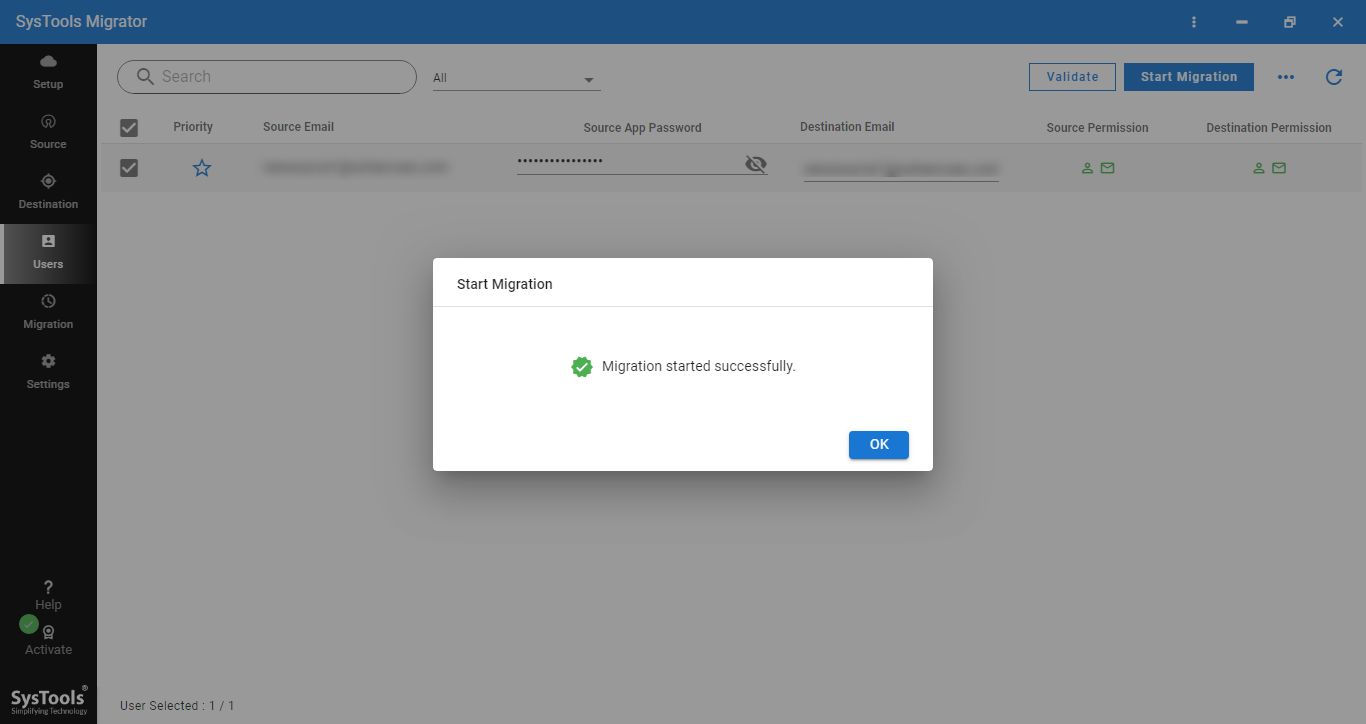
Step 8. After validation of user accounts, click on the Start Migration button to begin the process.
Issues You May Face When Connecting Hostinger Email to Gmail
While adding your Hostinger email to Gmail is a straightforward process, you may encounter some issues along the way. Here are a few of them:
- Problems in server settings – Double-check the server settings for your Hostinger email account, including the incoming and outgoing mail server addresses, username, and password.
- IMAP/POP settings – Ensure that IMAP is enabled in your Hostinger email settings and that you have selected the correct option when adding your Hostinger email account to Gmail.
- Authentication issues – If you’re having trouble authenticating your Hostinger email account in Gmail, make sure you have entered the correct username and password.
- Firewall or antivirus software – Sometimes, firewall or antivirus software can interfere with the connection between the software and email services. Either temporarily inactivate them or whitelist the software process.
Conclusion
Managing several email accounts of different email services can be a time-consuming process. However, once you connect Hostinger email to Gmail, you can easily access all your emails in one place. In this guide, we discussed how to add Hostinger account to Gmail (Free, Google Workspace, G Suite) using 2 methods. We also discussed a tool to help you migrate your data if you are switching to Gmail permanently. You can even troubleshoot some issues that may occur during the process.
FAQ
How to Create a new email account in Hostinger?
- Log in to your Hostinger account and navigate to the Email section.
- Click on “Email Accounts” and then “Create a New Email Account“.
- Enter the desired email address and password for your new Hostinger email account.
- Choose the appropriate domain for your email address and click “Create“.
- That’s it! You have successfully created a new Hostinger email account.
